


Artificial Dungeons
In this guide, we’ll cover the new Dungeon Bosses, discussing key mechanics and the countermeasures players can use to conquer the higher-tier stages. These bosses were introduced alongside enemies with two Elemental Weaknesses, though at the cost of also doubling their Elemental Resistances.
Encore Missions
Significantly more challenging than Instance Dungeons, the Encore Missions require players to build teams around complex mechanics. Failure to address these mechanics properly will likely prevent you from defeating the bosses.
The Scorching Lava Stone Guardian
Also referred to as the Lava Golem by the player base, this boss is similar to other golem-type bosses, featuring high damage reduction and slow but devastating attacks that can kill your Hunters in one or two hits. However, it is relatively straightforward when it comes to gimmicks. We’ll focus on the elemental-advantaged teams, as while it is possible to defeat the boss without this advantage, the task can be daunting even with a high level of investment.
Wind Team

This team is easier to assemble, especially since Woo Jinchul is given to all players along with his weapon, and Mirei’s excellent damage output is a significant asset. The Wind team doesn’t rely on any complex strategies; proper timing is the key to handling the encounter.
Start with Woo, aiming to break the boss as quickly as possible. Then, switch to your support Hunter, such as Min, Han Se-Mi, or even Meilin or Lee Bora. Finish your rotation by bringing in Mirei and dealing as much burst damage as possible before rotating her out whenever the boss becomes untargetable. While destroying the Rock Pillars can make the fight easier by providing more room to maneuver, it is not strictly necessary.
The Wind team has a much higher Total Power and optimization, allowing it to three-star the encounter
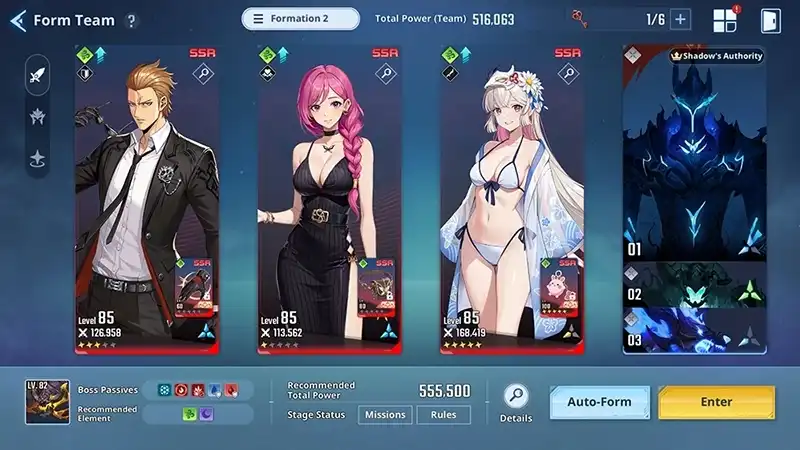
Dark(ish) Team
This team is more challenging to execute and requires either every Dark Hunter to deal substantial damage or a strong Silver Mane Baek (SMBaek) to exploit the %HP damage mechanics at his disposal.
Lim offers high break and solid damage output, while Lee Bora can buff all your Dark Hunters and deal damage even after being switched out. SMBaek can employ his full kit, especially since Bleed and other %HP-based damage effects are enabled. The main downsides of this team are the lack of burst damage and the high level of investment required.
Lim could be replaced by Woo, and Bora could be replaced by Min, but at that point, you might as well opt for the Wind team instead.
Dark team, with a Total Power slightly above the red threshold, will take longer. However, more investment or better gear for SMBaek could change this outcome significantly.
The Pursuing Death Stalker
Commonly referred to as "The Scorpion" by most players (because, let’s be honest, it’s exactly that—no need for a long, complicated name), this boss presents more annoying gimmicks than the Golem, making certain Hunters essential unless your Total Power (TP) is significantly above the recommendation.
The Scorpion’s main gimmick is its passive health regeneration, which heals it by a percentage of its maximum health continuously. Therefore, the most crucial aspect of team building for this fight is ensuring you have at least one source of the Unhealable debuff or heal reduction. Cha Hae-In or Yoo Soohyun are ideal for this role, as they also happen to be the best damage dealers against this boss. Min is an excellent supporter in this battle, especially since both primary damage dealers specialize in burst damage. While Meilin is also an option, she doesn’t pack as much of a punch as Min.
As with most fights these days, having a Breaker is also essential. The Scorpion will frequently enter phases where it charges a powerful nuke and gains massive damage reduction, making Breaking the only way to stop it. It also buries itself under the sand, becoming untargetable before reappearing either at the players' feet or at a distance when preparing to charge its nuke. All of its attacks will at least stagger you unless you have super armor or a shield, making it even more frustrating to land your burst.
Team Compositions
Fire-Light Team
While a mono Fire team Works best in killing the boss for those at high end by being able to constantly rotate through three powerful damage dealers (Emma being a sub DPS at high dupes/with her exclusive weapon), we found that a double Fire + Light team consisting of Emma, Min, and Yoo Soohyun is easier to build around while being more forgiving in play.
This team follows a double support + DPS format, allowing for mistakes thanks to Min’s powerful heals and Emma’s shields. Emma can eventually be replaced by Go Gunhee, but in that case, it might be easier to switch to a mono Light team. The only downside of Yoo is, as usual, her inability to adjust her position easily and the length of her skills’ animations. Her ability to deal high burst damage at A1 however makes her a very efficient DPS, focusing on hyper buffing her and unleashing her Ultimate + Hellfire combo. Igris will be used as the team greatly benefits from dealing critical hits.
Mono Light Team
Mono Light teams have become very powerful with the addition of Go Gunhee. His and Cha’s ability to rapidly rotate through their entire kits during buff/debuff windows makes this team easy to use and fun, requiring a high number of actions per minute (APM) to pilot effectively.
Mono Light teams have become very powerful with the addition of Go Gunhee. His and Cha’s ability to rapidly rotate through their entire kits during buff/debuff windows makes this team easy to use and fun, requiring a high number of actions per minute (APM) to pilot effectively.
Instance Dungeons
Here come the dungeons featuring Sun Jinwoo (SJW). Kargalgan might be a familiar face to most, and his kit will be similar to his story version. The Cursed Giant Eiberg, however, is a new addition to the game. Aside from his totem mechanics, he resembles what you’d expect from a fairly basic Souls game boss. Both bosses are manageable due to their double elemental weaknesses, making it possible to use very strong free-to-play (F2P) weapons or even stronger SSR ones with great effectiveness.
The Almighty Shaman, Kargalgan

Weak to Wind and Dark, West Wind (WW) and the Shadow Scythe are premier options for anyone who hasn’t invested heavily in other SSR Dark weapons. For those with a powerful Plum Sword or Moonshadow, both are excellent choices, either as a duo or paired with one of the first two weapons mentioned.
In terms of strategy, the most notable gimmicks are Kargalgan’s ability to gain a large shield and the appearance of totems that make him invulnerable while he channels a powerful spirit bomb—complete with arms raised and everything. Keep your powerful skills or Ultimate ready for this phase, which occurs around 30% HP.
For supports, a Breaker with elemental advantage will significantly help in quickly breaking Kargalgan’s gauge and dealing substantial damage. Besides that, bringing two supporters to heal and buff SJW’s damage, as usual, will work well in this fight. If the shield becomes too troublesome, Dongsoo and Meilin are valid options (Meilin can be brought even if the shield isn’t an issue).
The Cursed Giant Eiberg

This boss is a bit trickier since strong weapons of the required elements are harder to come by, and his gimmick of summoning two totems with special effects can waste a lot of time. After dealing enough damage to the boss, he becomes invulnerable and summons two totems in the same spots each time. The red totem slowly heals the Giant, while the blue one gradually drains all your mana until it is destroyed. It’s advised to focus on destroying the blue totem first, as losing your mana will drastically reduce your damage output and make it harder to break the totem. The boss will continue attacking, so try to dodge and use shadow step on the totem for a quick and efficient takedown.
Aside from that, the boss isn’t complicated. He will jump around the map quite a bit and attack multiple times in a row, so be mindful of how you use your dashes.
For weapons, the reliable Orb of Avarice is a must-have for anyone lacking highly invested SSR weapons like Phoenix Soul. The Huntsman is also good, thanks to its innate breaking abilities, but Radiru’s bow can also be used. It’s also possible to use Thetis Grimoire or even Plum Sword/Moonshadow if your goal is to super-buff with only one strong weapon like the Orb or Phoenix Soul.
For supports, the same strategy as with Kargalgan applies: a strong Breaker with elemental advantage and any form of damage buffs will suffice.