Introduction
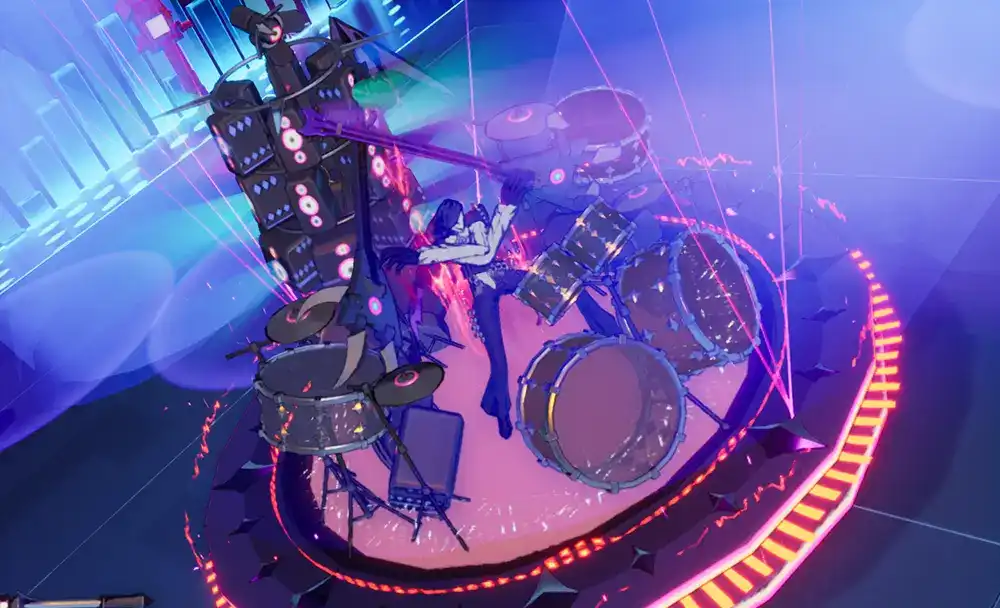
Second Boss to appear in Joint Training and deadliest rock band to tour Senlo, the Shriek Party (it’s really just one guy who does it all) brings a whole bunch of new mechanics making the fight feel fresh and fairly original.
There aren’t any mechanics designed to specifically counter certain team comps, so most of the teams can be used to great effect. Take note however that continuous damage is dealt to your Terminal so avoid stall teams.
The guide focuses mostly on the 300% difficulty, as the 200% version is more of a relaxed and beginner friendly version of the 300% difficulty.
Major Mechanics
There are 4 main mechanics for this boss, and most modifiers play into one or two of those: the damage to the Terminal and your Echomancers, the Summons, and the Buffs and Debuffs to your team.
The Boss has multiple ways to periodically deal damage both to your Echomancers and to your Terminal, some of which cannot be mitigated. Make sure to bring a Healer to keep your Team topped up, and aim for speed more than safety if you play with low TRM;
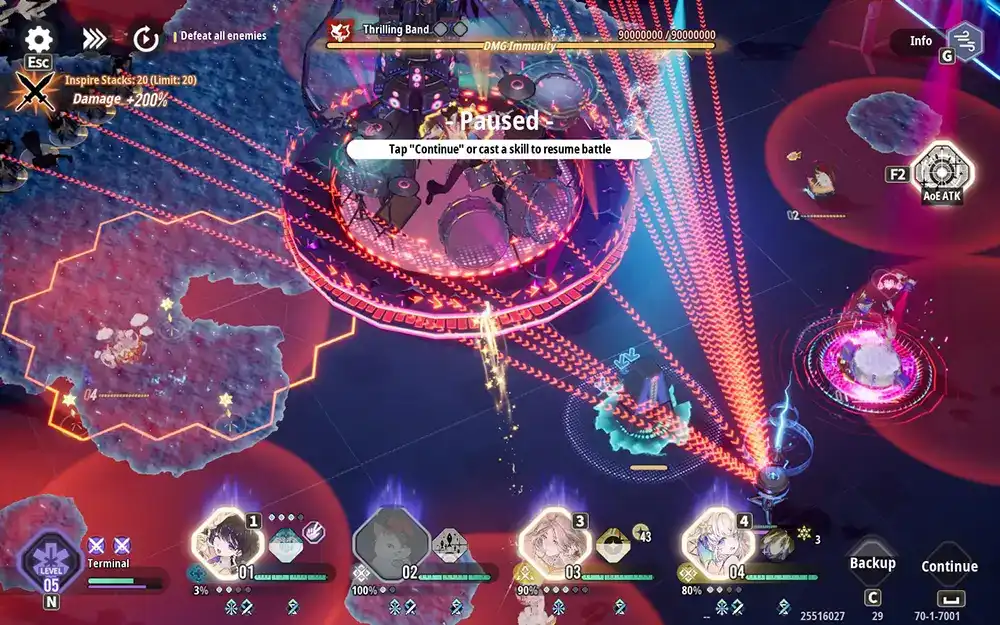
Whether in Guitarist or in Drummer modes, the Boss frequently summons add-ons. These can either disable the Spotlights and rob you of some Damage reduction, or it can be a swarm of both ground and flying enemies. While they don’t pose a threat to you in small numbers, a pack of them can take out in one volley nearly any Echomancer except for Tanks;
Throughout the fight, different Spotlights are going to be highlighted, and placing an Echomancer on it will grant passive Damage reduction to ALL your active Echomancers so long as they stand under a Spotlight.
Note that Echomancers can be positioned across the entire battlefield right from the start unlike usual stages, however movement from one set of tiles to another can feel fairly restricted.
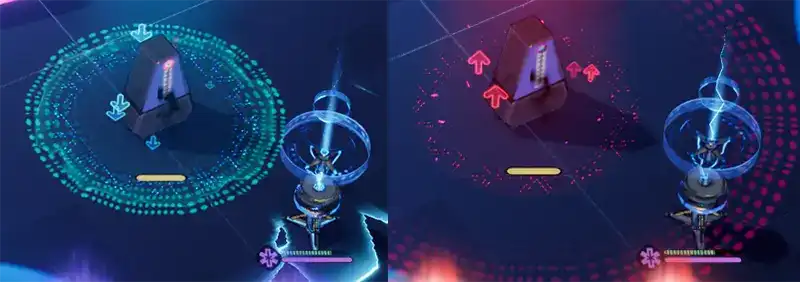
Once past the first phase, a Metronome is regularly summoned in front of your Terminal, and it’s going to either Buff or Debuff your damage by up to 50% for a time, with the buff only lasting half of the duration of the debuff. Exploit this short Buff window to deal extreme amounts of damage to the Boss, then immediately destroy the Metronome afterwards to skip the debuff phase.
Team Examples
The danger in this encounter comes from either taking too long to beat the Boss, or being overwhelmed by the add-ons and their volleys of attacks. For those reasons, there is no need to overly focus on defensive stats and/or skills, so you can opt for the classic “hard-hitters”.
Team #1 - The Trusty Summoner Team
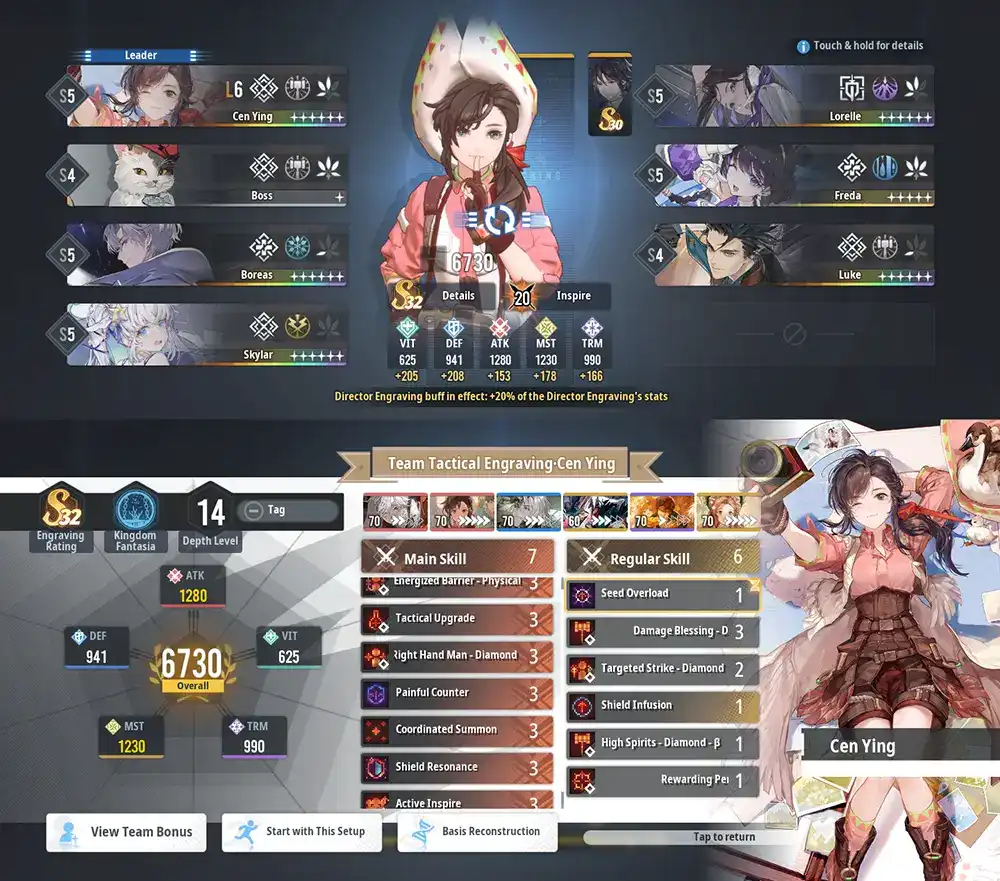
Characters: 






The Summoner team has gotten stronger yet again, with the addition of Boreas further amplifying Cen Ying’s damage. The fight is perfectly doable without Boreas and/or Luke, but their ability to buff both offense and defense is top notch.
On the side of Memory Traces,
Alternatively,
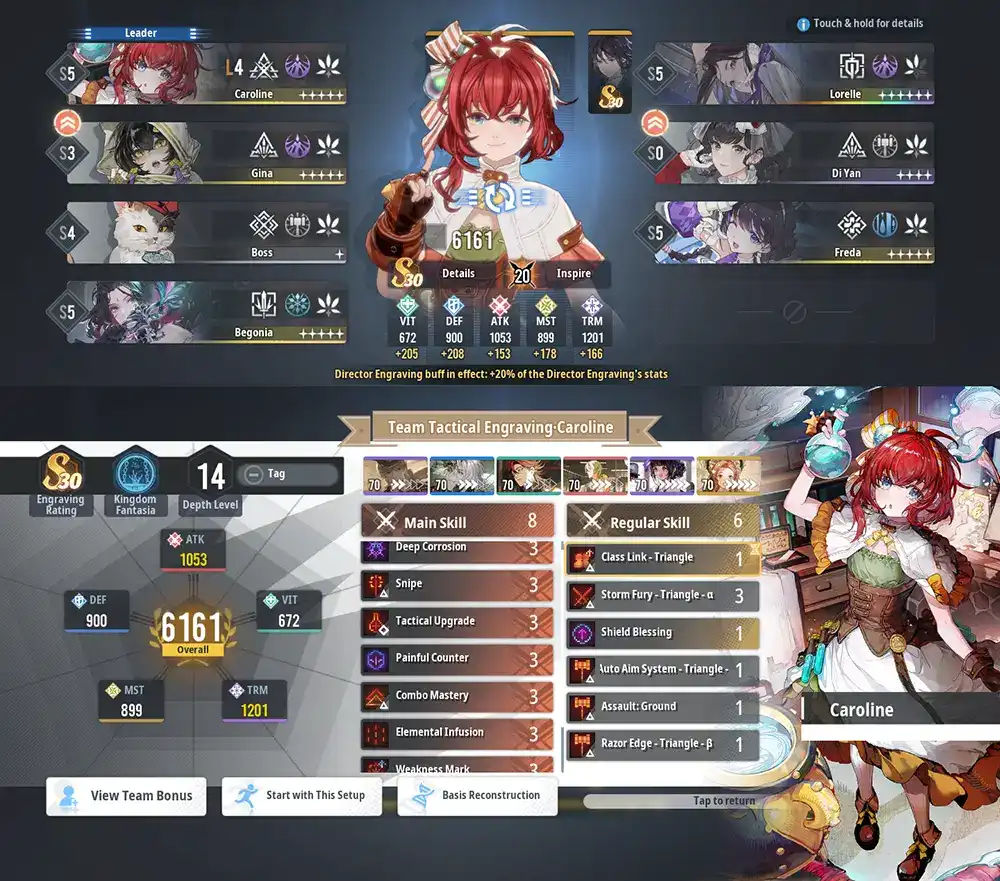
Team #2 - Corrosion, the Ol’ reliable
Characters: 






Do you feel like some things never change? Yeah, Corrosion is one of those. It always finds a way to be useful, and this time around there’s nothing to hold it back.
With the recent Nexus paths added to the game, getting 20 Inspire stacks with 2 Traces has become very consistent which makes it even easier to improve your Corrosion Team’s damage. Here,
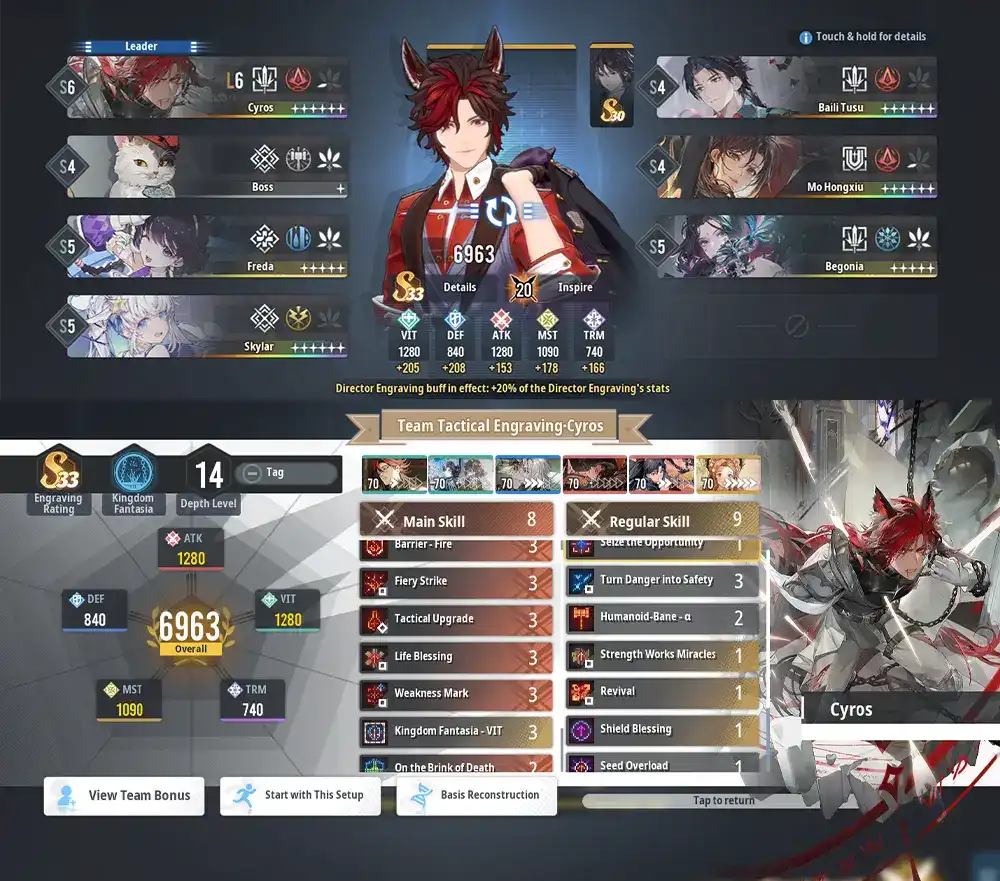
Team #3 - Pure Fire, ‘cause who needs Water Zones
Characters: 





The classic Fire Team works just fine here too, with its natural mix of offense and defense there isn’t much that can threaten your Strikers. The things you’d have to worry about are too low of a TRM rating putting you in a tougher race against the clock, and the Flying enemies (even though Baili Tusu can deal with them once transformed), so we bring Skylar or any other Anti-Air/Projectile.
Here too,
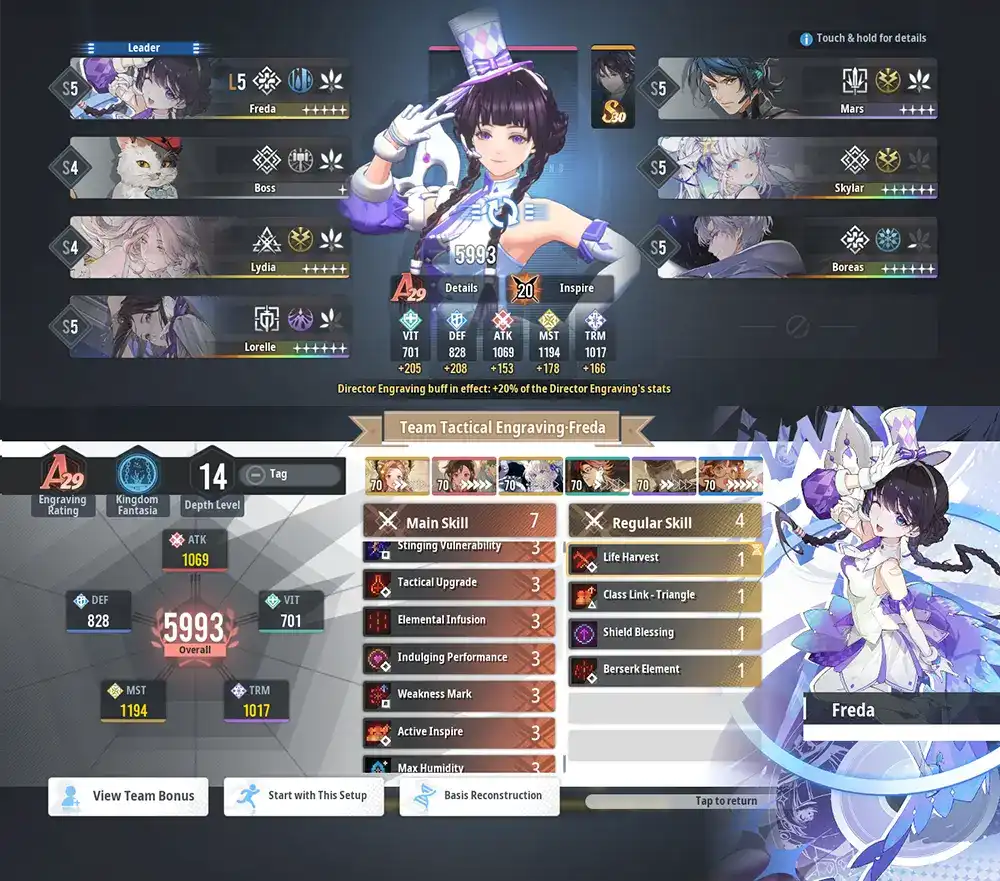
Team #4 - Electroconduct, that’s what
Characters: 






What better time to play Electroconduct than on a stage with free Water Zones? Skylar has excellent control, lightning res debuff, AoE clearing, fast Inspire stacking (with
The weakest link of that team is the Leader, with no dedicated Lightning Leader as of now (or they do not stack with MVIC).
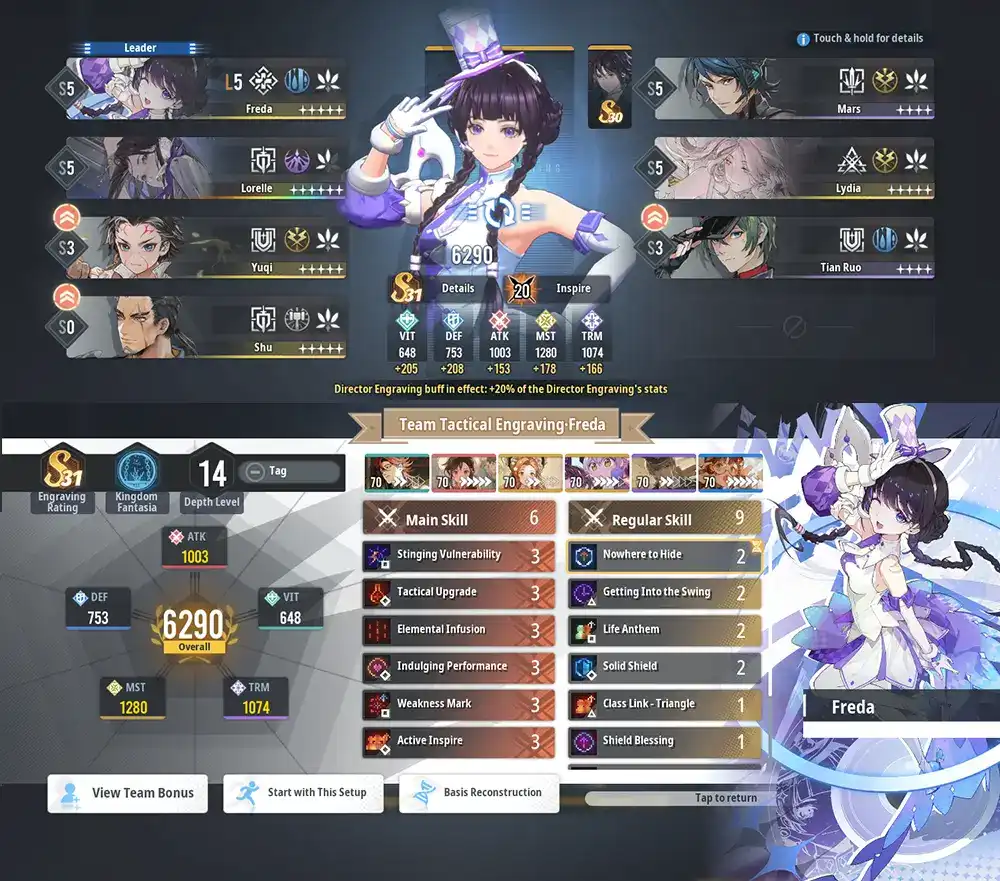
Team #5 - Lydia, what else?
Characters: 





The current Lydia-centric Electroconduct Team can also be run with the SR Memory Trace
With this build, you’ll want to add as many Square Echomancers as you can in order to rotate them in and out (or forcefully put them out of commission) and superbuff Lydia who you’ll place right next to the Boss (to give her the lowest HP percentage) to guarantee she’s the one receiving the MST buff. The more room you have to throw your Square Echomancers under the bus or shelf them, the more appealing it becomes to increase the level of Life Anthem.
For that reason, it’s preferred to opt for Inspire Traces that do not force you to bring Echomancers of other classes:
Lastly, the very high reliance on MST in this build makes it extremely flexible, as you do not need to focus on any other remaining stat, letting you pick them as you wish based on the encounter(s) you’re building for.
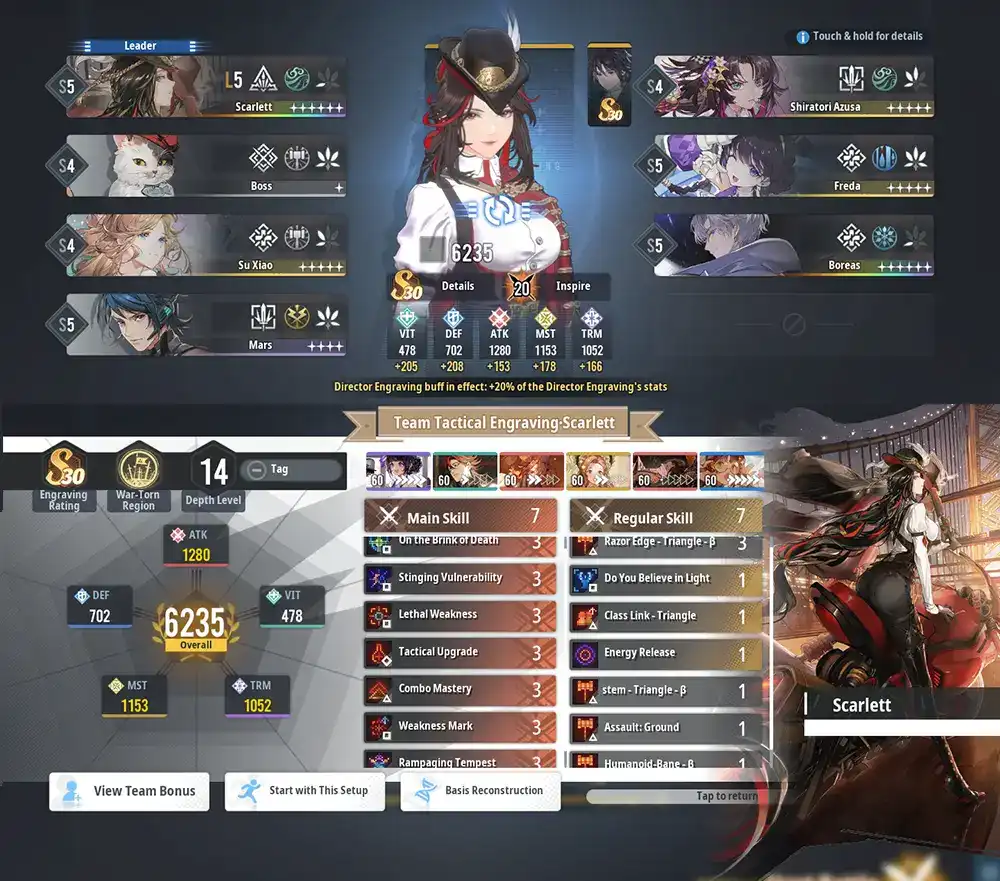
Team #6 - Scarlett & Friends
Characters: 






Very classic take on the Scarlett Team with
The team has extremely low VIT, so Boreas shields can come in clutch.


