


Equipment Basics

Equipment in Resonance Solstice is divided into three slots: Weapon, Armor and Accessories, which are further divided by four different quality/rarity tiers into R, SR, SSR, UR.
Each piece of equipment can improve characters' attributes and, in some cases, they can make or break Decks, since the Passives they can give are quite powerful.
How to Obtain Equipment
Resonance Solstice features a lot of methods to acquire gear and its resources. We will be covering the easiest ones so you can get an advantage early on, making sure you have a good start on the game.It’s also important to note that most methods are RNG-based, so don’t be discouraged if you don’t manage to get SSR gear early on; you will have plenty of chances.
Rest areas

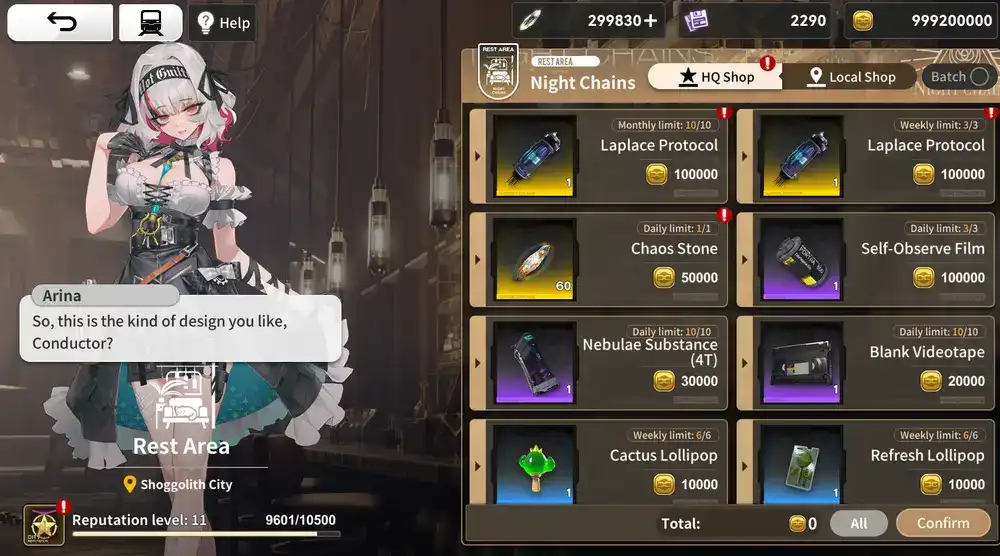
Each city has an NC shop that Arina runs, where she sells a lot of resources and that also includes Gear Boxes. These are random, so don’t count on this method as a reliable way of getting SSR gear.
Blue boxes have a 5% chance for SSR, Purple boxes have a 10% and lastly, Gold boxes have a 20% chance to drop a random piece of SSRgear.
BCRL Agency


BCRL Agency is the best way to level up your account while farming reputation in each city (and also getting rewarded for it). The Rail Safety Bureau allows you to fight enemies on 3 different difficulties, and you will get reputation as you clear higher stages.
Starting level 5, you unlock bounties, which you can do once per day per city, and they have a higher chance of dropping SSR and SRgear. Some items allow you to get more than one bounty per day, but this guide will not cover those.
Open World

While you are driving from station to station, you will find Anomalies and enemies that need to be dealt with across the Map. They are marked in purple and a white rainbow tone in the mini map, making it pretty easy to spot them.
Some Anomalies don’t cost Stamina, and you should always do them, since they provide a lot of resources needed to level up your Train and Characters. The Anomalies that do cost stamina, however, should be done only after you are done with the Main Campaign, since Stamina is scarce early on. *
Events
Since Resonance Solstice focuses more on trading than a conventional Autobattler Gacha, they do a lot of events to give extra resources. This is the easiest way of obtaining gear, and it’s also guaranteed to be SSR, so make sure you are always checking the events tab in-game to get resources, gear and even cosmetics sometimes.
Enhancement system
Resonance Solstice has a pretty good system when it comes to stat enhancement compared to other gachas in the same genre.
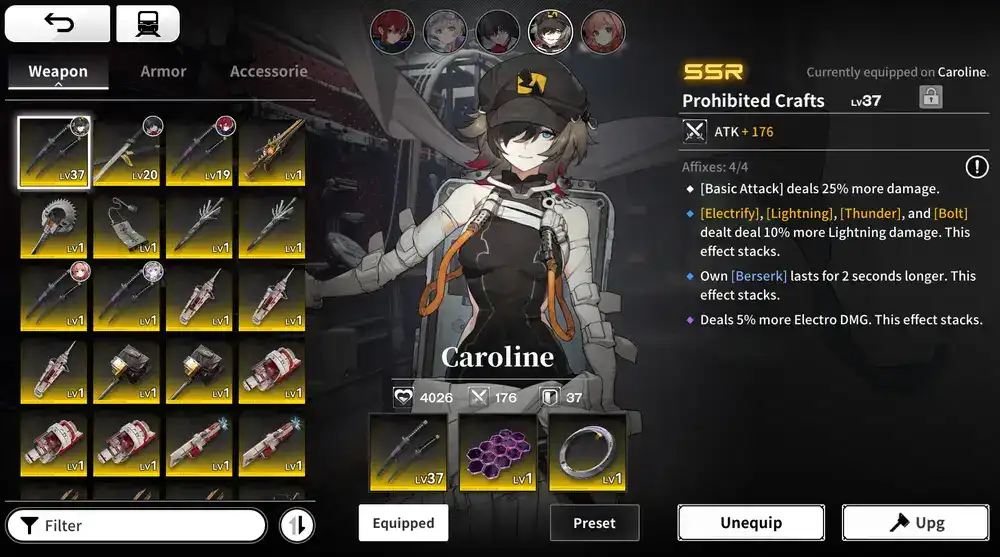
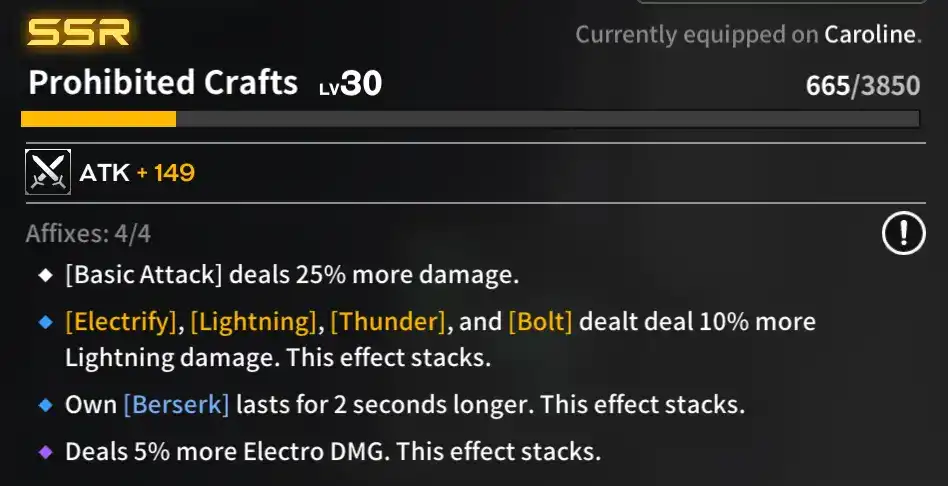
Gear stats are divided into two categories: Common Stats and Special Affixes.

Common Stats
Common Stats are fixed stats a gear will have based on its type (Weapon/Armor/Accessory) and rarity (R/ SR/ SSR/ UR) and there is no RNG on the amount you get when enhancing gear. They are the basic stats you can find in any game: HP, Attack and Defense.
- Weapons - Attack
- UR - 45~50
- SSR - 37~40
- SR - 29~32
- R - 22~24
- Armor - Defense
- UR - 45~49
- SSR - 37~40
- SR - 29~31
- R - 22~24
- Accessory - HP
- UR - 4200~4980
- SSR - 3734~4026
- SR - 2893~3178
- R - 2264~2413
Special Affixes
Special affixes include Elemental Effects, Cost Generation, Offensive or Defensive Passives, and much more. This will be the endgame farming in Resonance Solstice, since you can replace and reroll Special Affixes on your gear using Self-Observe Films.
When it comes to special affixes, you can obtain 6 Affixes in total on Accessories and 4 on Weapons and Armors. It’s also important to note that the first one it’s always fixed on that type of item and cannot be rerolled in any way. Every 10 levels you put into your equipment, you will unlock a new random substat that you can reroll instead.
This means there is no point in getting your gear past level 50 for Accessories and 30 for Weapons/Armors, since Accessories can only have 6 Affixes, whereas Weapons/Armors only have 4 and the first one is unlocked by default. The max level for any piece, however, it’s 80, meaning you will get 3-5 “free” stats you can reroll and replace every 10 levels from 30/50 to 80.
Those 3 extra stats are not applied to your equipment and have to be used on the Affix screen, as shown below:

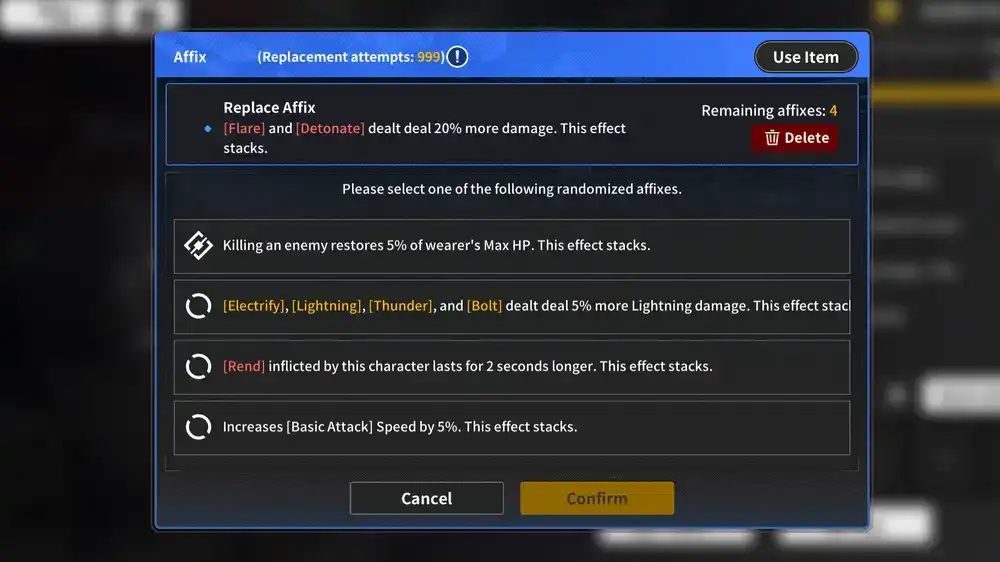
After selecting an Affix to replace, you will have to use either the additional Affixes you got from leveling up or by using a Self-Observe Film to reroll it, which gives the player an Affix from the pool of random Affixes.
While there’s a hard limit on how many times you can do this on each item, it’s so high that it doesn’t really matter, and you will be able to min-max long term regardless of this (999 replacement attempts per gear).

Equipment Tips for New Players
In no particular order, some tips to help new Resonance Solstice players when it comes to gear:
- Early on, it will be really hard to get SSR and UR gear because of the amount of RNG involved, so you can level up SR gear. Do not level up anything below SR, since it’s a waste of materials.
- Equipment boxes are not a reliable source of SSR gear, considering even the Gold boxes only have a 20% chance at giving you SSR gear, so you could instead aim to get the Investment rewards in each city (usually requires 400,000 or more Gold to achieve).
- Replacing Special Affixes is really expensive, and the currency used is scarce, so don’t do it unless the gear is SSR at least.
- Cost generation equipment is quite precious and will be used until the endgame, so make sure you don’t scrap any of those items by mistake.
- There is no point in getting gear past level 30/50 (depending on type), since that’s where all Special Affixes are unlocked and the amount of stats you get for each subsequent level is negligible. Way too expensive for the return you are getting.