Is it even worth to reroll?
The short answers is no.
And here's the long answer:
- Some time ago Mihoyo removed the Guest Login option from their games and obviously the option is also missing in Honkai: Star Rail. This means you will need to use a different account for every reroll attempt (because salting isn't working here either),
- So if you're already playing Genshin Impact for example, if you plan to reroll, there's no way to have both games on the same account.
- It takes around 30-40 minutes to finish the tutorial and reach the moment when you can actually start pulling,
- The long time is caused by the tutorial being quite story-heavy and you can't skip any of the conversations and have to click through them,
- The rates in the game are pretty low (0.3%/0.6% for a 5★ Character), so it might take you even a whole day of rolling to get one - and it's high chance it will be someone you don't want as you will be able to only do roughly 20-22 pulls when you unlock Warping,
- You are guaranteed to obtain a 5★ Character from the Departure Warp Banner within the first 50 pulls.
If you're still here, then I think this meme is perfect for you:

So let's continue with the reroll guide!
How to reroll
Reroll methods
Sadly, there's just one. As we mentioned in the warning section, you will need to prepare a ton of dummy emails if you plan to reroll - the salting method is blocked, so there's no other way.
So the rerolling process will look like this:
- Log in to the game with new mail,
- Suffer for 30-40 minutes and get finger cramps from all the clicking through dialogue,
- Then suffer even more as you're doing your pulls,
- Log out and log in with new email.
The prologue
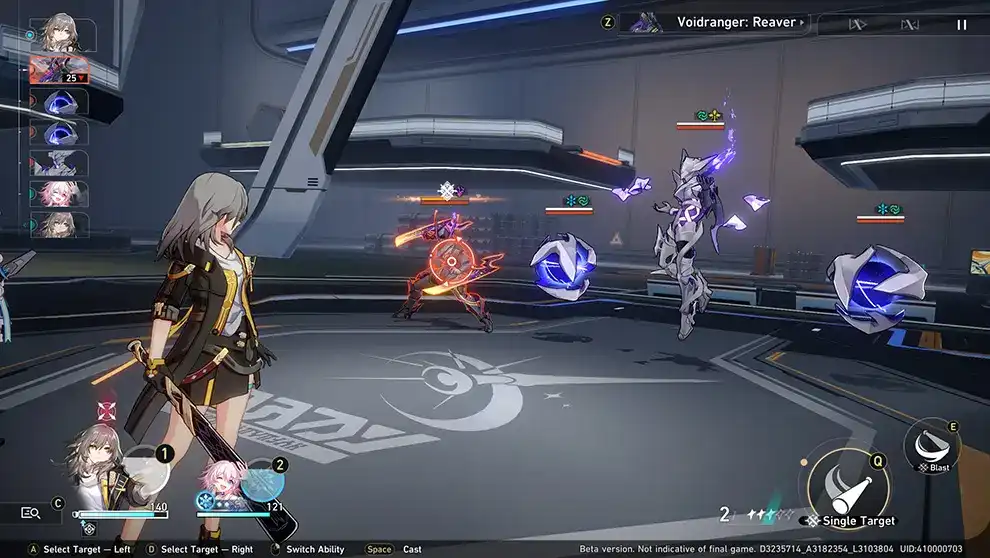
The prologue acts as tutorial in Honkai: Star Rail and as we mentioned earlier, it takes around 30-40 minutes to reach the part of it that unlocks Warping - that's how the gacha is called in this game.
While playing through the tutorial in the Final Beta we tried to create an optimal way of progressing though it, but sadly the game leads you in a corridor-like route, slowly introducing the main cast of characters and also various features of the game: exploration, roles, elements, basic combat mechanics, advanced combat mechanics and so on. So you can't really skip any part of the tutorial and have to play through everything the game throws at you.
But the worst offender that affects the length of the tutorial are conversations. Tons of conversations. And you can't skip them - you have to wait for every character to start saying their lines and then you can start clicking to interrupt them and 'move' to the next character. It's tedious.
Prologue steps (beware, spoilers!)
- You initially play as Kafka and explore the station together with Silver Wolf,
- After a few minutes of enjoying Kafka murdering the Antimatter Legion, you will unlock the main character - you can pick Female or Male version and your choice doesn't matter (gameplay-wise at least - since both genders have the same skills, passives etc.),
- March 7th and Dan Heng will replace Kafka and Silver Wolf and together with them you will continue your exploration and unlock Traces and Light Cones,
- Himeko will temporarily join your team at this point and she makes murdering the Legion much easier,
- A few fights later (including a boss battle) you will meet Asta and finally unlock Warping.
An important tip
Since the majority of the tutorial is focused on fighting, make sure to use your Adventure Logs to level up the MC and Dan Heng - this will improve their damage output and allow you to kill the monsters faster.
Pulling
Once you finish the tutorial and unlock Warping you will receive 20 Star Rail Passes in your mail. Sadly, the Passes can't be used on Rate-Up banners as they require Star Rail Special Passes instead. So you're forced to pull on either the Departure Warp (beginner banner) or on Stellar Warp (regular banner).
Also, your Trailblaze Level should be level 4 (though in some cases you can be only TL 3), so you might consider playing for a little bit more to reach TL 5 - this will give you additional 10 Star Rail Passes from the launch progression event.
The next reward in the event is locked behind reaching TL level 15 (which should take roughly 2-3 hours). While progressing till level 15 will give you enough Star Rail Passes to reach the pity on the Departure Warp and obtain your first 5★ Character, it takes quite a while.
So, now you have a few possible options:
| Name | How it works | Time required |
|---|---|---|
| The fast and greedy reroll | Do the 20 pulls on the Stellar Warp banner right after unlocking warping. Your aim here is to start with 2x 5★ Characters - one from the 20 pulls done on Stellar Warp banner and the other from the Departure Warp pity within 50 pulls. Just keep in mind that it might take you a lot of tries to get a 5★ from the initial 20 pulls - there's only 0.3% chance to pull one. You can also play for a 10-15 more minutes and reach TL 5 to get 10 additional tickets. | 30-40 minutes |
| The patient one | Do the 20 pulls on the Departure Warp banner right after unlocking warping (while the banner has 50 pull pity, you might get the 5★ character earlier). If you're unlucky, just keep playing and you will get 10 more tickets at TL 5 and another 10 tickets at TL 15. This is enough to reach the 50 pity, because the banner has 20% discount (you need to only use 40 tickets to do 50 pulls). You will get one of the 7 available characters and if it's someone you like - you're done! If not, you have to try again. |
|
Volkin and Grim explain the reroll process and provide an alternative way of rolling to get the 50 pulls on the Newbie banner:
5★ Characters
You can obtain both 5★ Characters and Light Cones from both banners. Here's the list of possible 5★ Characters:
Information about the Standard banner:
- The rate for pulling a 5★ Character from this banner is currently set at 0.3% (and 0.3% for a 5★ Light Cone),
- The rate for pulling a 4★ Character from this banner is currently set at 5.1%.
Now which of the 7 available characters is the best one? Let's go over each of them to show their good and bad sides!
| Character | Role | Comments | Reroll value |
|---|---|---|---|
| Amplifier | While there are stronger Amplifiers available in the game nowadays (ie. Ruan Mei and Robin), Bronya is still being used even if she's a standard characters in quite a lot of compositions - to the point of being BIS for some DPS. | ||
| DPS | Himeko is a damage dealer that focuses on doing AoE damage - she can clear wave after wave of enemies without breaking a sweat and she can do it with class! A top tier unit for Pure Fiction endgame mode, but she struggles a bit in the two other ones (MoC and AS). She's a decent starter damage dealer that only gets stronger as you invest into her and who can be played both as Crit and Break DPS. | ||
| DPS | Clara is an unique damage dealer as her gameplay is actually the opposite of any other DPS - she just sits in the back and let Svarog (her mecha protector) do the heavy lifting by countering those who dared to attack Clara. She specializes in AoE and Blast damage as the more enemies there are on the field, the higher the chance she gets hit only for Svarog to start taking his revenge. She's also easy to build and can be even ran in a full 4-star team, which makes her a great unit to build your account around. | ||
| Sustain | Since the release of Lynx, getting Bailu isn't as important anymore - she's still a great Healer, but no longer a priority. Her revive passive helps you cover some mistakes as it will prevent the first death of an ally in a battle, but other healers offer your team much more. | ||
| Sustain | Gepard is a Shielder who can replace the healer in your team once you invest into him, but in the early game he is struggling a lot compared to them. You're better off using other sustain options and then coming back to him later for the hard content where he shines (like Swarm Disaster). | ||
| Specialist | Welt is a debuffer who also can output decent damage once you manage to pull a few dupes. His debuffs revolve around slowing the enemy down and delaying his actions, so your team can deal use all their skills before letting the boss counter attack. Sadly he's a bit too niche with what he does and often using a more generic debuffer will help your team more - especially because there's a lot of great options for this role when it comes to 4 star characters. | ||
| DPS | Yanqing is a damage dealer who is the opposite of Himeko - not only element wise, but also gameplay wise. He's focused on dealing massive single target damage and buffing himself to do even more damage. Sadly, he aged really badly since the release and is inferior to every other 5 star DPS and even more 4 star DPS. Mainly due to his kit wanting him to never get hit, which is impossible to do in the current state of the game - also, even if you manage to do that, he still underperforms compared to others. |
Reroll value explanation:
- - The best you can go for,
- - The runner-up who won't disappoint you,
- - A versatile character with something unique that makes it stand out,
- - While they aren't strong enough to stand on the podium, they still have some good things about them that make them worth using - so they deserve a cookie reward!
4★ Characters
On top of the 5★ characters who are your main reroll targets, there's actually quite a lot of strong 4★ ones that you might want to look out for. You might also want to check the Free Characters guide that lists all the 4★ characters you can get for free from various places:
Now let's discuss the 4★ that are a great addition to a fresh account:
| Character | Role | Comments |
|---|---|---|
| Amplifier | Tingyun is the best 4★ buffer in the game who can restore Energy to the main carry and allow him to use his Ultimate more often. Thanks to that and the other buffs she can provide, she's easy to slot in a lot of teams and is a powerhouse from early to endgame. | |
| Sustain | Gallagher is the best 4★ Healer in the game who can even compete with Limited Healers. He's very strong generic healer who also has his own niche in the Break team - the best carrier of QPQ Light Cone (helps with energy issues). | |
| Amplifier | Pela is a debuffer who can reduce enemies' DEF which is one of the best ways to scale your team's damage. She's easy to use, easy to build and doesn't require Eidolons, which makes her a great pick for new players. |


