


Ideal
HP%
Desire
HP%
Imagination
DEF% = EGO Regen >= HP%
Last review update
Season 2
Last build update
Season 2
Last profile update*
15.03.2026
*Profile update means updates done to reviews/builds/gear within a season - showing the last date we changed anything on this page.
To learn more about Orlea check the sections below. Use the tabs to quickly switch to the kind of information you're looking for.
Profile
Review
Epiphanies
Gear
Deck & Teams
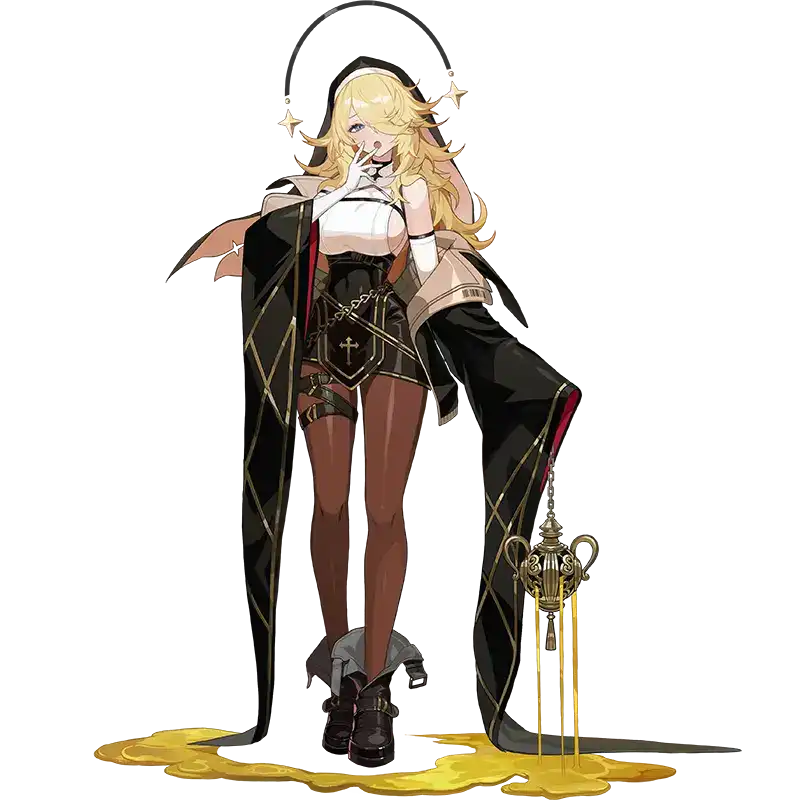
Profile
Attack,My Minions
Heaven's Healing
Show Effects
Sacred Censer
Show Effects
Growth Acceleration
Show Effects
Annoying
Show Effects
Growing Creature
Show Effects
Will of Light
Show Effects
Softie ★
Show Effects
Swiftie ★
Show Effects
Sturdie ★
Show Effects
Softie ★★
Show Effects
Swiftie ★★
Show Effects
Sturdie ★★
Show Effects
Softie ★★★
Show Effects
Swiftie ★★★
Show Effects
Sturdie ★★★
Show Effects
Salvation
Ego Skill
Show Effects
Epiphany cards are special evolutions for the cards you can obtain while playing the roguelike mode. Only some cards in the character's deck can get Epiphany effects. Since there's quite a lot of them, we don't display them by default - press the button below to show them. There are also Divine variants of Epiphany cards, but we're still working on gathering them.
Sacred Censer I
Show Effects
Sacred Censer II
Show Effects
Sacred Censer III
Show Effects
Sacred Censer IV
Show Effects
Sacred Censer V
Show Effects
Growth Acceleration I
Show Effects
Growth Acceleration II
Show Effects
Growth Acceleration III
Show Effects
Growth Acceleration IV
Show Effects
Growth Acceleration V
Show Effects
Annoying I
Show Effects
Annoying II
Show Effects
Annoying III
Show Effects
Annoying IV
Show Effects
Annoying V
Show Effects
Growing Creature I
Show Effects
Growing Creature II
Show Effects
Growing Creature III
Show Effects
Growing Creature IV
Show Effects
Growing Creature V
Show Effects
Epiphany Bonus
Potential 1
Basic Card Upgrade
Potential 2
Common Card Upgrade
Potential 3
Basic Card Proficiency
Potential 3-1
Unique Card Upgrade
Potential 4
Health Proficiency
Potential 5
Basic Card Proficiency
Potential 5-1
Divine Epiphany Adaptation
Potential 5-2
Attack Proficiency
Potential 6
Unique Stat Upgrade
Potential 7
Sleeping Memory
Manifest Ego 1
Awakening Memory
Manifest Ego 2
Vivid Memory
Manifest Ego 3
Inner Memory
Manifest Ego 4
Complete Memory
Manifest Ego 5
Liberated Memory
Manifest Ego 6
Review
Orlea is an Instinct Attribute Controller that can do it all - she has buffs, debuffs, heals, shields and some damage thanks to her unique mechanic “Creations”. Creations are generated cards with each having its own special use, plus a retain effect. Orlea can generate 3 different types of Creations through her cards, each of which costs 0 AP and has both an on-use and [Retain] effect. The three types of Creations are Toughie, who Shields on use and heals on [Retain]; Swiftie, who gains damage on [Retain] which can be dished out to a target on use; and Softie, who buffs damage (multiplicatively) both when used and on [Retain].
Orlea’s other main claim to fame is her ability to trigger the [Retain] keyword outside of the ordinary activation window through multiple of her cards. This effect single-handedly puts her into consideration in any team that values [Retain]. Orlea herself is a great benefactor of this, thanks to each of her Creations having powerful [Retain] effects, but this can also be a game-changer for some other Combatant and Neutral Cards, unlocking usually impossible strategies.
As strong and flexible as Orlea’s kit is, the one thing she’s missing is natural Draw Power, meaning she’s best paired up with other Combatants that can pick up the slack. The other consideration when team building for Orlea is that her main buffs from Softie are multiplicative, not additive which favors high base value attacks compared to low damage high hit count attacks, which when combined with the fact that Orlea also applies [Vulnerable] as her main debuff means she’s often best used with Damage Dealers capable of dealing maximum damage in singular attacks which hit hard instead of often.
Playing Orlea boils down to leveraging all of her Creations effectively and making use of her ability to forcibly activate [Retain] effects multiple times a turn, every turn. This allows her to both play actively and passively, with the only limiting factor often being getting the Creations you need, plus ensuring you have the hand space to hold onto them.
Capable of decent shielding as well as great passive and active healing.
Can deal a bit of damage when playing around Swiftie.
Highly flexible thanks to so many different Creation effects.
Can be played both actively through forcibly using [Retain] plus passively by maintaining them in hand.
Strong multiplicative card buffing.
Able to trigger her own and other characters' [Retain] effects on demand with some card.
Creations and [Retain] cards can end up clogging your hand when held too long.
No Card Draw.
Certain strategies can require multiple turns to gain value from Creation [Retain] effects
The ratings below are based on the Season Save Data modes and the Chaos Manifestation mode. Each of the modes values different mechanics, so some characters may shine in one of the, while being underwhelming in the other.
Orlea’s main mechanics lie in her card generation and holding cards in hand to trigger effects.
[Creation] Cards: Orlea can create three types of [Creation] cards through her Ego Skill and Skill cards, Sacred Censer and Growing Creature. [Creation] cards come in three rarities ★, ★★ and ★★★ with each rarity continually increasing in power. Creations of the same type and rarity in hand merge automatically into one of a higher rarity unless they’re already at the max rarity of ★★★. All [Creation] cards have the [Exhaust], [Retain] and [Creation] tags, which you can find explanations for below. Last but not least, each creation has a “use” effect and a [Retain] effect. Here’s what each of Orlea’s three creations does:
Softie (★/★★/★★★): Orlea’s most meta-relevant Creation, responsible for most of her buffing and debuffing Potential in one way or another. The [Retain] effect can be saved up to massively buff a single attack and its use effect can be used as a generic full team buff. Its effects are:
Use: Increases the damage of all allies by +10/20/35% (multiplicative) for 1 turn.
[Retain]: Increases the damage of the next Attack Card used by any character by +10/20/35% (multiplicative). This can stack infinitely and has no duration, meaning it can be stacked across turns, allowing for a truly immense single-attack buff.
Swiftie (★/★★/★★★): Responsible for much of Orlea’s own damage Potential, but usually not enough to position her as a dedicated Damage Dealer. Useful in Chaos and has some applications in Save, but usually not as universally appreciated as her other two Creations.
Use: Deals a strong hit of damage scaling on Attack.
[Retain]: Increases the damage of this Attack Card by a fixed amount (additive). This increase has no duration and no stack size limit, letting it stack for as long as you hold it in your hand across turns.
Toughie (★/★★/★★★): The source of all of Orlea’s shielding and a large amount of her Potential healing. Not as exciting as the creations above, but necessary for keeping the team alive and fulfilling Orlea’s role as a controller.
Use: Grants a solid-sized shield.
[Retain]: Provides a decent heal every trigger.
[Retain]: Cards with the [Retain] tag remain in your hand at the end of the turn instead of being Discarded. Many of Orlea’s cards have effects that trigger when they are Retained and she can also trigger these effects manually with her Skill cards Growth Acceleration and Will of Light.
[Exhaust]: All of Orlea’s Creation cards [Exhaust], meaning they’re removed from the deck after use. Because they can only be used once, you’ll want to save high ★ Creations for important turns.
3-1: Adds a 50% chance to generate 1 Creation(★) card to her healing cards. Decent for [Creation] generation, but won’t trigger very often and you realistically want to remove these Basic Cards anyway.
5-1: Orlea’s 5-1 Potential Node provides an additional 10% healing to her Basic Healing Card “Healing of Light”. An okay node for helping out with sustain early in Chaos, but not a must-have if you’re looking to save resources.
7: Gives allies a +6% Critical Chance at the start of battle if Orlea’s Attack is above 700, or her Defense is above 300. An extremely powerful node for any Combatant when paired with Orlea. A must-have unlock and a stat target you absolutely need to fulfill, as 6% Crit Rate is a huge buff to the team.
Base
Ego 1
Orlea’s first Ego node grants the [Retain] to “Will of Light”, allowing you to hold it across turns you don’t use it. In hyper-optimized Orlea strategies that play through all her cards each turn, this Ego isn’t that powerful, but in Chaos or slower strategies that can’t do that or are looking to time cards instead of playing them all out every turn, the addition of [Retain] can be a useful bonus.
Ego 2
Upgrades Orlea’s Creation card to also trigger their [Retain] effects whenever they Evolve, granting Orlea even more avenues to trigger [Retain] effects mid-turn without having to wait. This Ego skill isn’t a game-changer for Orlea, but is certainly a nice bonus which can net you some extra damage, healing and buffing for free.
Ego 3
Orlea’s E3 improves her Ego Skill. It will now also evolve the Creations made, which, due to her last Ego node, will trigger the [Retain] effect. Creating 3 individual Creations at their highest level whilst also triggering their [Retain] effect can be a huge swing in a battle, which now makes her Ego skill a proper cooldown-like ability, which is far more worth the 6EP it costs to use.
Ego 4
Orlea’s fourth Ego level provides a passive 10% (multiplicative) damage buff to all allies while she holds a Creation in her hand. This boost is almost always going to be active and is entirely passive, making it a potent inclusion for almost any team and a notable boost to Orlea’s Potential.
Ego 5
This node increases the base and maximum level of Orlea’s [Basic Card Upgrade], [Unique Card Upgrade] and [Common Card Upgrade] Potentials by 3. Provides small increases to damage, healing and shielding, but definitely not a meaningful increase to Orlea’s power.
Ego 6
Orlea’s final Ego point adds an additional effect to her Creation cards, causing them to deal 50% Fixed Damage per ★ in their name, resulting in 50 - 150% Fixed Damage each creation used. This doesn’t help Orlea’s Supportive role at all, but does allow her to deal a little extra damage, which can help out in Chaos and sometimes Save Data as well.
Salvation
Ego Skill
Show Effects
Orela’s Ego Skill Salvation costs an exorbitant 6 EP and generates a ★★ of each creation. This effect usually doesn’t justify the incredibly high EP cost it takes to activate it. If it’s all you have available at the time, though, it’s best used for some emergency Shields (from Toughie) or a damage buff (from Softie), but otherwise avoid using it and prioritize other, more powerful Ego skills.
Attack,My Minions
Orlea’s Basic Attack Card, which isn’t notable or important to her main strategy, meaning it’s almost always the first target for removal.
Heaven's Healing
Show Effects
A basic healing Skill card for when Toughie and other healing cards aren’t available. When you have her 3-1 Potential unlocked, it also offers a 50% chance to create a Level 1 Creation. A solid card for early on in Chaos, but also usually not kept in most endgame Orlea decks.
Sacred Censer
Show Effects
A 1-cost Skill card that is always drawn in the first hand each battle, thanks to the [Initiation] tag putting it on top of the draw pile. At Baseline, it generates 2 Creation(★) cards on use and is the main way Orlea generates her Creations. After Epiphanies, this card becomes even stronger, making it even more of a focal point for Orlea’s kit.
Growth Acceleration
Show Effects
A 1-cost Skill card that heals and triggers one of Orlea’s own [Retain] cards in hand two times. This card is how Orlea can play more actively in teams and doesn’t need to wait for the end of every turn to activate her Creation effects. When optimizing decks for Orlea, this is one of the go-to cards you’ll be constructing strategies around.
Tip: The restriction of this card only working on “Orlea’s cards” means it still works on Neutral Cards that are in Orlea’s deck, which can open up powerful synergies.
Annoying
Show Effects
A 0-cost Attack Card that deals Fixed Damage based on the number of cards in your hand. This card can end up hitting quite a lot if you have a full hand of cards (9 times), allowing it to deal some solid damage. But the fact that it deals Fixed Damage means it cannot scale, limiting its maximum potential. This, on top of the factthat Orlea is usually played as a Support, not a Damage Dealer, usually means this card is less of a focus in most decks.
Growing Creature
Show Effects
A 1-cost Skill card that has both an on-use effect plus a [Retain] effect. The on use effect generates 1 Creation(★) card when played. The [Retain] effect, on the other hand is quite different. When Retained, this card transforms into a ★★★ Creation, removing itself from your deck in the process. This card is usually best used with its [Retain] effect for immediate access to a high rarity Creation, but due to how the transformation works, this can only happen once.
Will of Light
Show Effects
A 1-cost Skill card that grants a burst of healing, but more importantly, activates the [Retain] effects of all cards in hand even of other Combatants. This card is an incredibly powerful synergy tool for [Retain] based strategies and one of the major reasons you might consider bringing Orlea to the team. One consideration to keep in mind with this card, though, is that it can’t gain Normal or Divine Epiphanies, which means while it’s strong, it might not always be the card you want to duplicate at the high end of play.
Best Epiphanies
Note
We have given a star rating for each Epiphany, showing how strong and useful it is - with 1★ being the lowest rating and 5★ the highest.
Sacred Censer I
Show Effects
Sacred Censer II
Show Effects
Sacred Censer III
Show Effects
Sacred Censer IV
Show Effects
Sacred Censer V
Show Effects
Epiphanies:
Divine Epiphanies:
Which Divine Epiphany to go for will depend on what your team needs and which Epiphany you chose, but here are the main ones to look out for if you have spare Save Data: Draw 1, -1 Cost Reduction
Growth Acceleration I
Show Effects
Growth Acceleration II
Show Effects
Growth Acceleration III
Show Effects
Growth Acceleration IV
Show Effects
Growth Acceleration V
Show Effects
Epiphanies:
Divine Epiphanies:
Which Divine Epiphany to go for will depend on what your team needs and which Epiphany you chose, but here are the main ones to look out for if you have spare Save Data: Draw 1, -1 Cost Reduction.
Annoying I
Show Effects
Annoying II
Show Effects
Annoying III
Show Effects
Annoying IV
Show Effects
Annoying V
Show Effects
Epiphanies:
Divine Epiphanies:
Divines are not recommended for this card because the Save Data points can be allocated elsewhere.
Growing Creature I
Show Effects
Growing Creature II
Show Effects
Growing Creature III
Show Effects
Growing Creature IV
Show Effects
Growing Creature V
Show Effects
Epiphanies:
Divine Epiphanies:
Divine Epiphanies are lost when the ‘[Retain]’ effect triggers, meaning they effectively do nothing on this card.
Gear
The Memory Fragments & Equipment suggestions below are based on calculations we did. If you want to check the damage formula and how scaling the damage works in CZN, check this guide.
[4-PC]: When generating or using Exhaust Skill Cards, +5% to Damage Amount of all allies (max 15%).
Orlea is easily able to max out Glory Reign's effect to grant the entire team a 15% (multiplicative) damage boost permanantly thanks to how often she creates and consumes her creation cards 2 out of 3 of which are skill cards. It's important to Note that Glory Reign's effect cannot be stacked so if you already have this set on another character you should use a different memory fragment set-up on Orlea instead.
Use either 2P Tetra's for a tankiness and healing/shielding boost plus an easier time hitting Orlea's recommended stat goals or 2P Healer's Journey to bolster the overall HP total of the team.
[2-PC]: +12% Max HP.
[2-PC]: +12% Defense.
Only recommended if you already have a 4P Glory's Reign user on your team otherwise you should just use that set instead. If running 2/2/2 though it's best to run 2P Healer's Journey with 2P Tetra's to maximize surviability, healing and help get Orlea to 300 DEF.
Use either Seth's Scarab to boost the healing and damage output of Basics for early chaos comfort or 2P Blackwing/2P Executioner's to boost Orlea's total damage output by a small amount. Alternatively you can also bypass these small bonuses in favor of using non-set pieces to target better main/sub stats.
In a lot of cases, flat sub-stats are better than percentage ones when it comes to HP, ATK and DEF. The reason behind this is that in CZN the characters stats are pretty low and you get more value from flat bonus rather than percentage one based on calcs.
DEF > DEF% > EGO Regen = HP > HP%
To activate Orlea's incredibly potent Potential 7, she either needs 300 DEF or 700 ATK (in the stat screen). Usually targeting DEF is both easier and more productive given Orlea's usual supportive role, so prioritize reaching above 300 DEF above all else. If you're playing Orlea witha focus on damage though, you can instead go for 700 ATK.
Our best Partner recommendation try to balance both the raw damage boost they provide based on our calculations with the additional utility provided by the skill - combined with how it interacts with the characters's kit. We have rated each Partner based on how much additional damage and the utility they provide. Read the comments under each Partner to better understand our reasoning.
No calculations in Chaos Zero Nightmare are completely accurate for all scenarios, including the ones below. What team, decks, epiphanies, gear, equipment, and enemies you’re facing all impact them. Because of this, take the results as guidelines and combine them with the explanations to make your decisions. Calculations use endgame save data set-ups, including 5 turns of combat using the whole deck with all Ego skills unless otherwise stated.
The assigned combatant's Defense, Health and healing are increased by 12–20%.
When the assigned combatant Draws for the first time each turn using an ability, +8/16% Damage dealt by allies for 1 turn.
Discard up to 3 cards, then Draw +1 cards equal to the number discarded.
Nyx is a fine all-around choice for Orlea thanks to her ability to churn through 4 cards of the deck with her Ego Skill while also still having some multipliers to survivability and healing. Nyx also does offer a small buff, which is nice, but only activates on Draw, something which Orlea doesn't have in her deck baseline, meaning outside of specific builds, it may not be active outside of using Nyx's Ego Skill. The one downside of Nyx is that her Ego Skill costs 4EP, which in Save Data game modes usually means you won't be able to easily use it in Turn 1, something the other main supportive Draw Partner Yuri, is capable of. All up, if you need Draw Power or value the Passive stats Nyx provides, she's a safe pick for most teams, but if all you care about is survivability/combo potential, check out other options as they may suit your needs better.
Increase the assigned Combatant's Defense by 16–24%
Increase Damage, Shield Gain, and Heal Amounts of the assigned Combatant's Retain cards by 15/30%.
At the end of the turn, deal Fixed Damage to all enemies equal to 15/30% for each retained card of the assigned combatant.
+5/10% Damage for enemies with the Instinct attribute.
Heal 100%. Activate the Retain effect of all cards held by the assigned combatant.
Noel is Orlea's Signature Partner whos main benefit is her Ego Skill, which can be used to execute larger-than-usual [Retain] combos for Orlea's creations and the fact that she also provides a large amount of base defensive stats and healing/shielding multipliers. Noel also amplifies Orlea's damage the best out of all Controller Partners, but unless you're specifically building Orlea for that, it usually isn't too relevant. Noel is mainly worth running if you specifically value her Ego Skill that forcibly triggers [Retain] effects or you want to boost Orlea's damage; otherwise, it's usually better to commit more to maxing out survivability or picking up some draw power with other Partners.
The assigned combatant's Attack is increased by 8/16%.
Upon the first shuffle, the assigned combatant's damage dealt is increased by 8/16%.
Draw 2 Cards.
Yuri isn't a Controller Partner, so her Passives don't work. However, that doesn't disable her Ego Skill, which is a potent Draw 2 for 2 EP. Yuri is an alternative option to Nyx, which can be used in Turn 1 in Save Data and is far more accessible and spammable in Chaos. If that appeals to you and you're ok downgrading how many cards you're drawing and losing out on all the Passives Nyx provides, you can use Yuri instead.
The assigned combatant's HP and healing are increased by 8/12%.
At the start of the turn, gain [Ponopoko's Cheer] equal to the number of enemies with attack intentions.
[Ponopoko's Cheer]: Incoming Damage is reduced by 10/20%. Upon activation, remove Ponopoko's Cheer (stacks up to 3 times).
Heal 200%. Apply 1 Damage Reduction.
Arwen is one of the top options when it comes to survivability, thanks to her great Passive Stats, which boost both healing and total team health, but most of all her constantly refreshing Damage Reduction. If you're struggling to stay alive and need more survivability, especially in fights that launch large but infrequent attacks, giving up utility or draw for Arwen can be worth considering, especially in Chaos-based game modes.
The assigned combatant's Defense is increased by 12/24%.
At the end of battle, recover 3/6% Health.
Heal 100%. When in an Injured state, increase Healing Amount by 50%. 1 Morale for 1 turn.
Alyssa works as an alternative to Arwen with quite a different stat line, favoring Combat Defense and Passive Healing instead. Usually not as universally strong for survivability as Arwen, but if you value the higher defense over Arwen's higher HP total and mitigation buff, she can be a more appealing option.
The assigned combatant's Defense is increased by 8/16%.
If the combatant ends the turn without using an attack card, Heal 30/60% at the start of the next turn.
Heal 100%. For 1 turn, gain 1 Fortitude.
A F2P survivability option that falls behind both Arwen and Alyssa in most cases, but is still an acceptable choice if you have neither of them available at an acceptable Ego level.
In the Zero System, it’s incredibly easy to access all items acquirable via the shop thanks to the five free refreshes you get each shop node - that's why the recommendations below are limited to them only. ATTENTION! Area-specific items can sometimes be more powerful than shop items, but are far less consistent to get or require running a specific world or giving up certain event options. Use the shop list as a starting point for building up your deck saves.
The equipment recommendations are based on items obtainable in Season 2’s Chaos - Burning Life. If you’re running content outside of Season 2, it’s possible some options may not be available for acquisition, or that other options not obtainable in Burning Life may be better.
We're currently working on updating all builds for Season 3.
Deck & Teams
After her Season 2 Buffs, Orlea is an amazing unit for Chaos who can double as both your healer and shielder. She does have RNG elements to her, but her base card healing is substantial, and she has ways to easily get passive healing when played right as well.
Most Nine compositions base themselves around Orlea as the primary buffer. For more specific Nine compositions, you can see Nine’s page on this site.
Kayron’s highest Potential teams generally base themselves around Orlea buffs because of how well he can scale with them. But, it can be difficult to make these teams work without high investment (consistently), similar to Nine’s issues with Orlea.
While it is not as strong after its nerfs, Orlea and Beryl can be used together to do a combinative Spore and multiplicative buff setup for most dps characters.


Base performance of the character.