character from the Supporter class, who wields a Assault Rifle
weapon and belongs to the Fire
element. She's part of the Pilgrim
faction.
To learn more about Grave check the sections below. Use the tabs to quickly switch to the kind of information you're looking for.
To learn more about Grave check the sections below. Use the tabs to quickly switch to the kind of information you're looking for.
Profile
Review
Investment tips
Teams
Profile
Skills
Normal Attack
Normal Attack
Assault Rifle
Mode: Normal
Ammo: 60
Reload: 2s
■ Affects Target(s).
Deals 17.91% of ATK as damage.
Deals 200% damage when attacking core.
Skill 1
Heat Emission
Passive
Cooldown: -
■ Activates when Prediction status ends. Affects self.
Removes 100% of bullets.
Heat Emission: Reload Ratio ▼ 50%. Removes Heat Emission under certain conditions.
■ Activates only when in Heat Emission status. Affects self.
Recovers 2% of final Max HP every I sec continuously.
■ Activates only when in Heat Emission status. Affects all allies.
Burst Gauge filling speed ▲ 38.96% continuously.
Pierce Damage ▲ 48.4% continuously.
Skill 2
Overheat
Passive
Cooldown: -
■ Activates after landing 15 normal attack(s). Affects self.
Overheat 1: ATK ▲ 15.48%. Removed upon reloading to max ammunition.
■ Activates when normal attack hits after Prediction status takes effect. Affects self.
Changes according to the number of hits, Previous effects trigger repeatedly.
■ 30 time(s): when in Prediction and Overheat I status.
Overheat II: ATK ▲ 20.66% continuously.
■ 60 time(s): when in Prediction and Overheat Il status.
Overheat III: Attack Damage ▲ 30.8% continuously.
Burst
Plot Spoiler
Active
Cooldown: 20s
■ Affects self.
Prediction:
Current HP ▼ 1% every I sec, lasts for 10 sec.
Grants unlimited ammunition for 10 sec.
Gains Pierce for 10 sec.
Pierce Damage ▲ 52.8% for 10 sec.
Critical Rate ▲ 85.19% for 10 sec.
■ Affects all allies.
Attack Damage ▲ 48.2% for 10 sec.
Pierce Damage ▲ 39.98% for 10 sec.
Max Ammunition Capacity ▲ 3 round(s) for 10 sec.
Specialties
Buffer
Pierce
Voice Actors
ENG
-
JPN
-
KR
-
Gallery
Review
Review
What do you get when you dissect the brain of a genius researcher, to a point she forgets most of the stuff and becomes a warrior instead Sadly, we don’t get a Maxwell 2.0 who buffs a lot and also deals very high damage herself. Instead, we have a hybrid of a better version of Mari and a worse version of Crown, with her DPS being just a couple notches above Dorothy.
Can you give a brief summary about this unit?
Grave is an elite support that works in many teams but collaborates best with Pierce DPS. She is the amalgamation of Mari and Dorothy: a buffer for Pierce Units, has notable DPS with her Pierce AR, and in lieu of CDR, provides additional burst generation. Her Pierce is helpful in situations where multiple enemies and parts line up, inflating her damage as well as assisting the team in dealing with mobs hiding behind shields. Unless very well invested, she is not going to beat Crown in terms of supportive utility (for Pierce Units specifically), but she is an excellent unit regardless. One special factor that she has over others is her ability to accelerate burst regeneration at the end of Full Burst(s), allowing the team to deal immense DPS throughout 14 FB instead of the usual 13 FB over 3 minutes!
In PvE, Grave is a DPS and support hybrid who synergizes well with Asuka and Alice, and also Rei, though the interaction is in reverse, with Rei buffing her instead. She can also work extremely well with Red Hood, Snow White and Maxwell, who can in turn buff her as well, a reciprocal relationship. Since her element is Fire, she thrives best against Wind enemies, and it is no coincidence that most meta Fire DPS also have Pierce. Grave also features guaranteed critical hits, narrowing the damage gap between enemies with a core and those without. All of these apply for both Bossing as well as Campaign.
Grave is an excellent unit for both and will see proper use in Raids. She is a strong power-creep candidate to the recently released Mari. This means that another B2 has been released in the ever-creeping and ever-threatened B2 category. Beware Blanc, Rem, and S.Rosanna, your spot in Solo Raid Meta is seriously threatened by this 6-pack having Pierce support!
As for Campaign, she is extremely viable if players do not have Crown and are looking for the next best thing. While Tia-Naga and Rouge-Blanc (or Blanc-Noir) can provide survivability, Grave is a better offensive option if you run any pierce units (commonly used pierce units in Campaign are Red Hood, Alice, Asuka and Maxwell).
In PvP, Grave is pretty meh. She is very much around the level of Mari or Crown, albeit a bit weaker. Her best description would be a slightly better version of SRosanna. Her main use is to be used as a B2 Buffer for B3s that can immediately nuke the opposing team, such as Scarlet, Ein, Cinderella, etc. She can be used situationally, but unless you know what you are doing, it might be better off not using her.
Should I pull this unit?
Yes! At least one copy. She is an awesome support and DPS hybrid that will take you on a virtual sightseeing tour. For endgame players, you might think slotting her in Raid comps might be a bit challenging as we have a lot of options (Rouge-Blanc, Crown, Naga, Mari, S. Rosanna etc), but there will always be a place for her. She is simply an excellent offensive unit despite her lack of utility (i.e. healing and/or AoE to clear rocks, etc). If a new DPS that synergizes even better with her kit is released, her usage will rise. She might also occasionally help in Campaign and against Indivilia in Anomaly Interception, but whether she will surpass Crown's utility strength depends on her investments. She will also shine UR for her burst generation acceleration capabilities.
Dupes are not necessary because her kit, fortunately, has no caster's ATK gimmicks, so your gem stash is safe. We believe that she is more of a support than a DPS. However, if you want to splurge on her for some YouTube video about Grave demolishing Indivilia in Anomaly Interception or getting free Alteisen clears, then go ahead. If you want her to be a DPS, then dupes can be considered.
As always, exchanging is recommended over pulling due to the low pull rates (1%) of Pilgrim banners. We recommend saving pulls for the upcoming XMas Event next month and using mileage if possible. Very high priority pull if you lack Crown.
Usage Analysis and Tier List
Campaign (LD) - SS | Campaign (HD) - SS
An exterminator who knows no forgiveness. Good self DPS (with enough ATK at higher deficits) and supportive capability, especially at lower deficits. She is not better than Crown in the aspect that she fails to provide sufficient meaningful ATK buffs to the team, which are irrefutably more important than any other buffs at higher deficits. Crown's reload speed buff is also simply goated and helps a lot at rushing a boss or an elite mob with Asuka and/or Alice, as well as preventing Modernia from losing too much fire rate. She is also not better than Naga in the aspect that Naga works off-burst, giving insane undiluted Core Damage buffs and helping activate Crown's S2 faster while healing the team.
If you don't have Crown, she might as well be the next best unit you should consider using, if you fancy using Pierce DPS. However, we cannot confidently say Grave is better in all stages as they are designed differently. It is all trial and error. You might need a healer in one and Naga's core damage power in another. Maybe Mari's screenwipe will help you more. But, can they beat the convenience of Blanc Noir, Rouge Blanc, and Tia Naga?
In High Deficit, her Pierce won’t do much, else Dorothy would be cooking everyone too. Lacking base ATK as a Supporter only means that she will deal 1 damage sooner than an Attacker would against Raptures with higher DEF. However, her support buffs are still more than enough to make her an actively competitive choice for Campaign. She directly competes with Mari and Blanc.
There is just one rule when using Grave for campaign: do not get hit. Similar to Mari, Grave lacks survivability and is hence harder to use her in general, but what makes up for it is the fact that she allows your Perce DPS to wreak havoc on your opposition! Her Burst Gauge Filling Speed▲ allows players to push further and past many stages in a relatively casual way since she reduces the manual burden of having to generate burst generation substantially.
Bossing - SS
In most situations, she would be a regular SS, but in the right comp, she can rise to between SS and SSS. Grave is all about buffing the team while dealing damage at the same time. Her Pierce Damage synergizes well with many meta units, ranging from Asuka to Alice to Snow White to Red Hood. While some complement her more than others, she is quite versatile. She does not necessarily need to pair with Pierce DPS as ATK DMG is a universal buff.
Another thing that Grave excels at is speeding up the team's rotation and in some comps even extending the final Full Burst or giving another Full Burst! This sets her apart from other supports because, believe it or not, the faster rotations result in a lot of damage gain. In addition, against Fire-Weak bosses, Grave also packs a punch. She can edge Crown in this setting regardless of whether her buffs are stronger by offsetting the damage lost with her own DPS.
That being said, Asuka, Rei, and Alice, all being Fire, have a special connection with her. Alice is just hands down the best Fire DPS we have in the market, so indeed she is worth mentioning. However, what about Asuka and Rei? They have a reciprocal relationship. Asuka gives her Core Damage, whereas Grave gives her Pierce DMG▲ and ATK DMG▲. Asuka is also, if not, the only unit that can utilize Grave's Heat Emission Pierce bonus well. Rei gives her caster's ATK▲, which she lacks and benefits a lot from since Rei is an Attacker and she is a Supporter, and also ATK DMG▲ from Burst Skill; whereas Grave grants her ATK▲. Unfair exchange, but Rei is a buffer anyway.
Now, we would not say she is better than Crown, but if Crown joins other teams, then Grave is your second best choice for Solo B2. This is generally the case in Raid, especially if Crown will have to join the ranks of Cindy against Electric-Weak bosses. If you fancy, why not deploy both together with Crown as an off-burst B2 for some merriment and chaos? Well, not in Raid, obviously. That would be a waste of support. Visit the PvE Team Compositions section for some team ideas.
PVP - A
We are still waiting for Champions Arena's announcement (wow, ShiftUp, nice scam saying it will be released in October) before finalizing our tier list fix draft for PvP, so this is rather a preliminary rating for her.
Grave is equipped with a simple yet strong team-wide buff, which is why you will ever use her in PvP. However, she does come along with a couple of other perks that make her better than S.Rosanna. She comes with respectable personal DPS, making her a worthy contender in PvP. Her guaranteed critical hits are game-changing in a game mode where there is no core. You can use her as a buffer for any DPS, whether they have Pierce or not, and meanwhile when full burst starts, she will also provide decent frontline pressure.
Despite her magnificent offensive capability, her kit has no utility to help the team survive or cause disruption, and there are likely better B2 Burst Skills to use in most situations. Her wielding AR also feeds Jackal and Scarlet both, and she also does not provide that much burst gen herself, although it is much better than other ARs. Her Burst Generation is equal to that of Scarlet’s, which can allow her to be slotted in over units like Crown who severely lack burst gen. She is good for teamwiping and when you have an offensive lead; not so much under CP deficit or in defense teams. She might need a survivalist (Noise, Rumani, Moran, Jackal) to help sustain and tank before Full Burst.
Kit Analysis
Grave uses an Assault Rifle that, due to the effects of S1 and Burst Skill, have a unique and interesting playstyle. Basically, inside Full Burst (with her using Burst Skill), she has unlimited ammo. Then, at the end of Full Burst, she loses all her ammo and enters a dormant state where her reload is extended twice as long, during which she continually buffs the team. You can interrupt right in the middle of this 'clip reload', but then you will prematurely cease her buffs. The cycle repeats till the battle ends; this is the core of her gameplay, freediving outside Full Burst and peaking in Full Burst.
Her DPS is pretty much zero outside Full Burst, making it easier for us to control her DPS without worrying much about autoing her. Just focus on controlling your DPS and generate as much burst gen as possible.
As a side note, Grave's weapon multiplier is also higher than that of a regular AR, dealing 17.91% per shot as opposed to the regular ~13.5%. It is decent and allows Grave to contribute a considerable amount of auxiliary damage. Her weapon is also a clip AR, divided into 2 clips (1 second of reload each, totaling up to 4 seconds with Heat Emission). This seems long, but given that her playstyle involves forced reloading, it is not of our concern. Just focus purely on building her DPS via ELE, ATK, and Critical Damage OL.
Before the first Full Burst, Grave does not suffer from Heat Emission (see S1) and can help with burst gen. She recharges 0.45% burst energy per shot and 5.4% per second. This is the same as Drunk Scarlet.
Skill 1 - Cooling Off
After Burst Skill duration ends, Grave loses all her ammo and enters a 'refractory period' called Heat Emission, where her reloads are less effective and only recharge 50% of her ammo. She is unable to shoot and continues reloading for four 1-second quarters (assuming no cube attached and/or reload speed buffer). As long as she is reloading, she will apply continuous buffs to the team. This means the faster she reloads, the sooner her team buffs ends (making her somewhat anti-synergistic with Crown and Resilience Cube, if the team is composed of multiple Pierce DPS with good off-burst damage AND your rotation is too slow). The benefit of running Crown still outweighs the tradeoff, though. Check the Tips & Tricks section for the detailed info.
Try to maintain Heat Emission for as long as possible so that the team buffs stay active longer. Focus on recharging burst gen, so you can enter the next Full Burst before she fully reloads. Make good use of the bonus burst gen.
### Heat Emission Duration
If you want to know her Heat Emission’s timings: 1.2s from Burst ends => start reloading, 4s to reload the whole magazine.
This adds up to a total time limit of 5.2s for maintaining her S1 buffs, which is a normal interval between each Full Burst with CDR.
The buffs that she provides include Burst Gauge Filling Speed▲ and Pierce Damage▲, which both compensate for her lack of dynamism during this period. They are short-lived but helpful. She also regenerates 2% of Max HP (constant) per second during this period, recovering what she loses in Full Burst.
Pierce DPS with good off-burst damage pairs well with Grave. Asuka is a good example of a unit who can utilize this off-burst buff to its maximum. However, as always, damage outside Full Burst is still pretty low, so this buff is not as impactful as the value might suggest.
Note that the buff Heat Emission will end immediately if she reloads to full magazine (or) shoots after Burst ends (or) uses Burst Skill again.
Skill 2 - Build Up the Discharge
After shooting 15 times (1.25 seconds), Grave will earn Overheat I, a buff that strengthens her ATK. As long as Grave never fully reloads to max ammo capacity, she will never lose Overheat I. Unlike Heat Emission, shooting does not end Overheat I.
When Grave activates Burst Skill, she gains the effect Prediction for 10 seconds, during which she can activate the rest of S2. She cannot activate these outside Prediction, and all the buffs end immediately upon ending Prediction.
Shooting 30 ammo (2.5 seconds) during Overheat I status will gain her Overheat II, increasing her ATK further by 20.56%.
Shooting another 30 ammo (2.5 seconds) during Overheat II will gain her Overheat III, granting her an additional 30.48% ATK DMG.
This is the only selfish skill that Grave has when it comes to buffing her personal DPS, and it's pretty good at achieving that.
If we let Grave reload to max ammo capacity during Heat Emission, she will lose Overheat I, requiring her to later take her 6.25 seconds to reach Overheat III and leaving us with only 3.75 seconds of max stack utilization. This is bad if you plan to minmax her DPS. Instead, interrupt her reload midway to avoid losing Overheat I and never let her fully reload. This way, her ramping up will only take 5 seconds.
### Her Action Matters
When activating Burst Skill, if Grave is in reloading animation, she will lose Overheat I because the state of Infinite Ammo counts as completing a full reload. If she is in shooting animation, she will not lose Overheat I. From this, we can conclude that the most optimal play is to quickly swap to her, hold-peek, and start your chain reaction as soon as Burst Energy is fully recharged. However, her own DPS is not that impressive for you to be dripping sweat min-maxing her like that.
Burst - Long Awaited Climax
The peak of Grave's firepower — unlimited shooting with guaranteed critical hits. What else can be better than that? She is in fact the only unit with guaranteed critical hits right now that do not require some intensive OL-ing and team-building shenanigans. Grave's damage literally spikes like a mountain here, allowing her to deal some acceptable damage as a B2 buffer here. Mind you, she’s nowhere near a meta B3 DPS though.
When activated, Grave gains the effect Prediction for 10 seconds, during which she loses 1% of Max HP per second but gains:
Unlimited ammo, making her not choke at the worst timings.
Piercing basic attacks and Pierce DMG▲ to help the team take care of concealed mobs and swarms, or just boosting her damage against clustered hitboxes.
Critical Rate▲ that is enough to guarantee critical hits, making her damage consistent against enemies with and without cores.
At the same time, she also grants herself and her allies:
48.2% ATK DMG, which works for every unit.
39.88% Pierce DMG, which synergizes well with other Pierce DPS, like Asuka and Alice.
+3 max ammo capacity, which is small but impactful for units with low ammo count like SG, RL, and SR.
These secondary buffs are already higher than Mari's and also affect herself, making her ATK DMG stat go through the roof (not to mention S2!). It is even more if you bring Rei to the firework party too, and let's not forget Asuka with her overpowered Core Damage buff. The losing HP is not even a problem when she can recover it via S1 (not fully if you rotate extremely fast). These buffs are outright insane and worth Level 10 immediately, and the fact that it has 20s cooldown puts units like Clay to shame.
Note that Pierce DMG and ATK DMG belong in the same multiplier category, so one can be substituted for the other. In other words, Pierce DMG is just ATK DMG but for Pierce DPS.
When Prediction status ends, Grave enters a remission state, and her cycle repeats from S1. In proper teams with high burst gen, Full Burst can be initiated every ±12.5 seconds, resulting in an uptime of ~83.33%. This is something that you must target.
Since Grave's Burst Skill houses all her supportive buffs and self-enhancements, using her as an off-burst B2 is highly discouraged. Her S1 will not trigger, either.
Tips and Tricks + Synergy
With the information above, we can now play Grave to her maximum potential. Here are some good starting points:
During the team-building phase, try to pair Grave with as many Pierce DPS as possible so that they can take advantage of her epic buffs.
The key to abusing Grave is to enter Full Burst more often. During gameplay, it is recommended to manual the unit with the highest burst generation in your team at the end of each Full Burst. Ideally aim at pierceable enemies and terrain.
As soon as the burst energy bar is fully recharged, quickly swap to Grave, hold-peek at the sky or enemy, and start your Burst Chain Reaction — entering the next round of Prediction, to maintain S2’s buff.
When her Pierce is online, control the team or her to aim at spots where she can hit multiple enemies or parts at once. You can also hit enemies behind even the tankiest shields. Deconstruct them before they can deconstruct you.
Reload Speed makes Grave reload faster, which makes her potentially end her team buffs and Overheat I earlier than desired. However, do not be afraid of using Crown or Resilience Cube with her as the benefit likely outweighs the tradeoff. Albeit anti-synergistic, they do not even in the slightest reduce the team's Pierce DPS if you rotate fast enough, and DPS is not that strong outside Full Burst anyway.
Even then, avoid giving her too much Reload Speed, especially in slower teams. Her reload must always be at least 2.5 seconds long (as fast as the slowest CDR unit). The maximum tolerance of Reload Speed is therefore ±37.5% with some leeway.
Using an 8.2-second or 7.5-second CDR unit like Liter, Volume, DWife, and Rouge will allow you to save a few seconds the entire run, giving your final Full Burst more time OR even giving you another Full Burst (14 times instead of 13).
Investments
Gear Investments
Good thing Grave is not a picky heroine. She still works without any OL, but OL will grant her what she needs: damage. Since her playstyle involves forced reloading and unlimited ammo, she does not need Max Ammo OL. Instead, focus on ATK and ELE, and slip in some Critical Damage to abuse her guaranteed crits. Note that her kit does not have that much ATK, so ATK is effective on her.
Avoid Crit Rate if possible. It gives her nothing but CP. While there is no conflict like SAnis would have with Max Ammo, and that it would not reduce her damage, she gains nothing from it, unless you skimp on her Burst Skill.
Essential: -
Ideal: 4× ELE, 4× ATK, 4× CRIT DMG
Passable: 1~3× Crit Rate/Crit Damage, 1~2× Max Ammo
Priority: Medium (PVE)
Skill Investments
Skill 1: 4~10
Affects the team's burst gen speed and Pierce Damage▲'s effectiveness during downtime. Impactful for units with good off-burst damage like Asuka. Raise until an optimal rotation speed is achieved; upgrade on the go. Can max this too if you are an omega tryhard in Solo Raids.
Skill 2: 4-7
Affects her personal DPS only. Not as important as Burst Skill. Invest only if you plan to optimize her OL for damage.
Burst Skill: 10
The pinnacle of awesomeness and the peak of likely every support's skill (the strongest offensive support Burst Skill). Max immediately. Affects how much enhancement is given to the whole team and herself. Requires Level 10 for guaranteed crits without external Crit Rate buff.
Cube Investments
No particular cube. Use your highest leveled available cube, preferably Bastion, for covering up accidental mistakes in battle.
Resilience can negatively affect her gameplay as it speeds up her reload and concludes her buffs earlier, but it can make no difference if you can adapt and generate burst energy faster. In slower teams, this will be harder to compensate. Check Tips & Tricks section for more info.
Hit Rate can technically help land more core hits but quite minor, and no one has it leveled.
If there is a Critical Damage cube in the future, please use that instead (assuming equally invested).
Review
Pros
Has decent damage for a buffer. Can be considered a DPS / Support hybrid, especially for Fire-weak stages/bosses.
Overshadows Mari and completely power-creeps S. Rosanna — two limited Nikkes. They won’t be missed as hard if you have Grave.
Currently the only Nikke can reach 100% crit rate comfortably without intensive relying on OL. Allows for better performance on bosses without core.
Decent burst generation for an AR unit in PvP.
Has Pierce, which allows her to provide decent support damage in mob stages or to hidden boss parts.
Provides insane Burst Generation to the team, allowing for 14 Full Burst(s) over 3 minutes! Beneficial skill for auto players.
Good kit design: Auto-friendly use, but still has benefits in manualing her for peak potential.
Cheaper to build: S1 and S2 are optional to invest into, with her support capability mainly revolving around her Burst skill.
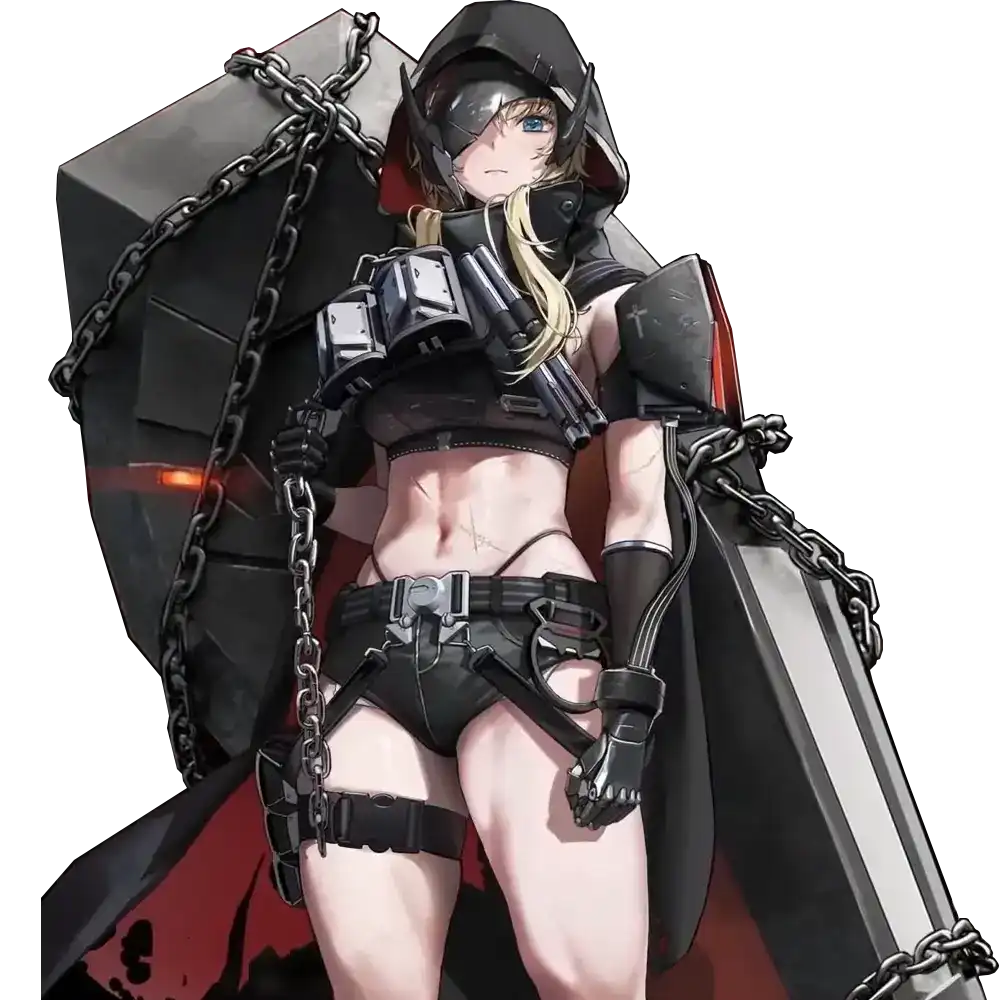
Mana did well. Look at those abs!
Amazing MLB Lobby screen! Amazing VAs! Best gym girl!
Cons
She lacks survivability skills, which makes her harder to use in Campaign as well as against most bosses.
The majority of her buffs are only for Pierce units.
The return on investment (RoI) of perfecting her OL will likely not impress you since her DPS is not that impressive compared to a Meta B3 DPS.
S1’s Pierce Damage buff is essentially useless due to how little time she spends outside Full Burst, which feels like a kit design flaw.
Loses ‘Overheat I’ buff if she bursts while in reloading animation, making her lose out on personal DPS. Need to peek to maintain it (not auto-friendly as she will always be reloading on auto).
Takes too long to stack self buffs, which she has to re-stack every Full Burst.
Awkward banner: Too strong to be a normal Nikke, too weak to be 1% Pilgrim rate-up banner, especially considering how all other Pilgrim banners have been groundbreaking meta-wise.
Ratings
S
Story
S
Bossing
B
PVP
Investment Tips
Skill Investment
Here's the explanation for all the numbers and colors used in the guide:
10/5/7 means upgrading Skill 1 to lvl 10, Skill 2 to lvl 5, and Burst Skill to lvl 7,
Yellow means the immediate investment when u get the unit. There are 3 reasons for this:
If the unit is Meta or High Priority, it will have a starting investment of more than 1/1/1 (such as 4/4/4) depending on what the unit provides.
If the unit is Medium or Low Priority, 1/1/1 will be mentioned, meaning no immediate investment is required, and you can invest in this character if you need to use it according to the priority listed.
If we deem that a unit does not have usable skills to be meta for any gamemode, no investment will be mentioned.
Blue means minimum investment to take advantage of the Nikke's skills. There are 2 reasons for this:
Sometimes, minimum investments are breakpoints such as for Noir or SAnis.
Sometimes, minimum investments are just the ideal way to progress to upgrade that unit, before moving on to Recommended and High.
Red means recommended investment for F2P players,
Purple means maximum recommended investment, in order to get the best out of the unit. You should only try to reach these investments if you have a surplus of Skill Books leftover.
More info:
The skill investment list below features a lot of Level 4 and 7 because they are easier to understand. Any higher levels will cost a new type of resource.
However, you may choose to upgrade to Level 5 if you need a stronger effect instead of 4, as the increase in Blue Manual cost from Level 4 to 5 is still low. The leap only starts from Level 6 onward.
There is also a leap from Level 3 to 4, so if you want to save a tiny bit of Blue Manuals, then leave at 3 instead of 4.
This Overload (OL) Recommendations and Priority guide unravels in detail everything you need about a character in terms of priority, overload targets (effects), and order of acquisition, alongside some notes to explain our thinking process.
For OL targets and order of acquisition, we decided to divide the target effects into several categories.
Essential: With all gear combined, your unit must have the roll(s) prescribed as a minimum requirement. Example: Charge Speed on Alice. You cannot compromise on these rolls.
Ideal: These rolls will improve your unit's performance significantly. Aim for 2 lines of Essential/Ideal per gear for maximum performance and the best Return on Investment (ROI). If you get 3, you are lucky. You can choose to only have 1 as well to save materials. Example: Elemental Damage on Scarlet.
Passable: Low-priority line that has either limited value or the impact is not as strong as other rolls. Should this show up as a bonus together with a better line, you can choose to keep them. Example: Charge Speed on Red Hood.
Overload effects are ordered by importance from Left to Right, which means anything on the left provides more value than the right. Effects that belong to the same group generate too similar an impact to make a difference (and are sometimes interchangeable). Try to follow this order as faithfully as possible for maximum mileage.
Additional tips:
Priority (PvE/PvP) isn't necessarily lower than Priority (Universal), which has no tag/label. It just indicates that this unit performs only in select types of content.
If a suggested effect has the number ×2 next to it, that means you should get the effect on at least 2 gear. The same idea applies to other numbers.
Focus on obtaining Essential(s) then you can start worrying about optimizing your rolls. Units require these to function, and the impact is too massive to ignore.
If a unit has no Essential(s), that means their performance is not that dependent on OL, but they can still benefit from good effects.
Remember that this is just a recommendation list, and attaining perfection is impossible. You will have to make some compromise, pick whichever rolls you desire the most, and conserve as much material as possible.
May want Damage Reduction because her team is usually run without healers. Fair personal damage. One of the best B2 buffers, but she doesn't scale off it.
PVP Priority
3/10
PVP Comment
May want Damage Reduction. Good B2 buffer with some personal damage.
Cube Investment
PVE
Destruction Cube
Assault Cube
Bastion Cube
PVP
Vigor Cube
Tempering Cube
Endurance Cube
No particular cube. Use your highest-level available cube, preferably Bastion, to cover up accidental mistakes in battle.
Teams
Teams
Team 71
Grave Steals Mari’s EVA friends
Mode: Bossing || Element: Fire
Characters
About the team
This team focuses on buffing Asuka and originally used Mari instead of Grave. Now, Grave is a better option here as she can benefit Asuka's and Rei's buff as well as providing the team with loads of Pierce DMG▲ and ATK DMG▲. If you somehow don't have built Alice, or if you are a fan of Evangelion, this team would excite you.
Substitutions
-
Team 72
Campaign Shenanigans
Mode: Campaign || Element: Fire
Characters
About the team
A variant of high-deficit Campaign team fixated on buffing Asuka's and Alice's ATK as much as possible to negate stat penalty. Great for pushing Fire-Weak Campaign (Ch. 28-32). Red Hood as a B1 buffer will provide a significant ATK buff to the team (including Grave — remember, stat conversion buff since Red Hood provides caster’s ATK buff). Grave, Asuka, and Alice can then demolish enemies together with their endless Pierce capabilities and lifesteal.
Substitutions
Crown can be used as an off-burst B2 buffer to provide ATK buff and Reload Speed when needed with occasional taunt but without shield. This does mean that Asuka will not enjoy her Elemental DMG buff. When using Crown, you may replace Asuka with Red Hood B3. Naga may be used over an off-burst Crown instead if Core Damage + some heals are more preferable. In stages that do not require CDR, you can ditch Liter/DWife/Rouge and run RH B1, together with Grave B2, and an off-burst Crown, Naga or Modernia. Of course, still using 2 Pierce DPS as the main B3s.
Team 73
Keep Pressuring The Frontline @3RL
Mode: PVP || Element: All
Characters
About the team
A very niché attacking team to punish disorganized comps with as few expensive units as possible. Grave and Modernia's Full Burst Adjacency Strike apply strong frontline pressure. Rumani can serve as an additional/secondary tank with some self-heal and taunting, and her being B1 (unlike Centi or Anis) does not block Grave's B2 from being used, opening up positional flexibilities. Use an Off-Burst Centi to accelerate Burst or ClipSG to additionally pressure the enemy's backline.