


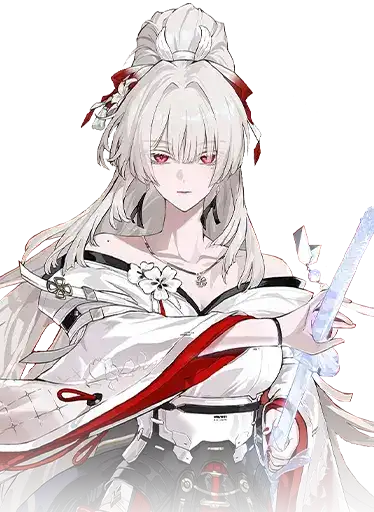


4 cost
CRIT DMG / CRIT Rate
3 cost
Glacio DMG%
3 cost
Glacio DMG% ≥ ATK%
1 cost
ATK%
1 cost
ATK%
Hiyuki has at least one video guide available, so if you prefer this sort of medium to learn more about a character, check it out:
Last review update
Patch 3.3
Last major build/calcs update
Patch 3.3
Last profile update*
May 20th, 2026
*Profile update means smaller edits to echoes, stats, synergies or teams that don't require new calculations.
To learn more about Hiyuki check the sections below. Use the tabs to quickly switch to the kind of information you're looking for.
Profile
Review
Build
Gameplay and teams
Calculations
Profile
Flaming Sakura Blade Art
Basic Attack - Present Self
Press Normal Attack consecutively or hold it down to perform up to 3 consecutive attacks, dealing Glacio DMG.
Basic Attack - Present Self Stage 3 applies 1 stack of Glacio Chafe on hit.
Heavy Attack - Frost Splinter: Present Self
When Dedication reaches 300 points, Heavy Attack - Frost Splinter: Present Self becomes available.
Hold Normal Attack to shoot out 3 arrows one by one at the cost of STA, dealing Glacio DMG, considered Resonance Liberation DMG. Hiyuki is immune to interruptions in the duration.
When the last arrow is shot, 300 points of Dedication is consumed and Foreclaiming: Inward Vision becomes available. The arrow applies 1 stack of Glacio Chafe on hit.
Mid-air Attack - Present Self
Consume STA to perform a Plunging Attack from Mid-air, dealing Glacio DMG.
Dodge Counter - Present Self
Press Normal Attack within a certain period after a successful Dodge to attack the target, dealing Glacio DMG.
Press Normal Attack within a certain period after casting this skill to perform Basic Attack - Present Self Stage 3.
Basic Attack - Foreclaimed Self
While in Foreclaimed Self, Basic Attack - Present Self is replaced by Basic Attack - Foreclaimed Self.
Perform up to 5 consecutive attacks, dealing Glacio DMG, considered Resonance Liberation DMG.
Basic Attack - Foreclaimed Self Stage 3, 4, and 5 each applies 1 stack of Glacio Chafe on hit.
Heavy Attack - Foreclaimed Self
In Foreclaimed Self, hold Normal Attack to enter Hold Breath, continuously consuming STA. When Normal Attack is released or STA is depleted, Hiyuki leaves the Hold Breath state and thrusts forward, dealing Glacio DMG, considered Resonance Liberation DMG. Press Normal Attack within a certain period after casting this skill to perform Basic Attack - Foreclaimed Self Stage 2.
If Hiyuki is attacked by an enemy within a certain period during the thrust, neutralize that instance of damage, Stagnate nearby targets, and become immune to interruptions for a certain period afterward while reducing all incoming damage by 100%. Press Normal Attack within a certain period after casting this skill to chain into Basic Attack - Foreclaimed Self Stage 4 instead.
Heavy Attack - Bitterfrost: Foreclaimed Self
When Whiteout Bitterfrost is full, Heavy Attack - Foreclaimed Self is replaced with Heavy Attack - Bitterfrost: Foreclaimed Self.
Hold Normal Attack and consume STA and 3 stacks of Whiteout Bitterfrost to gain 1 point of Snowforged Blade, dealing Glacio DMG, considered Resonance Liberation DMG.
Heavy Attack - Bitterfrost: Foreclaimed Self applies 1 stack of Glacio Chafe on hit.
If Hiyuki is airborne while casting this skill, she'll land on the ground first.
Mid-air Attack - Foreclaimed Self
While in Foreclaimed Self, Mid-air Attack - Present Self is replaced by Mid-air Attack - Foreclaimed Self.
Consume STA to perform up to 3 consecutive attacks in Mid-air, dealing Glacio DMG, considered Resonance Liberation DMG. Stage 3 is a Plunging Attack.
Mid-air Attack - Foreclaimed Self Stage 2 & 3 apply 1 stack of Glacio Chafe on hit.
The Mid-air Attack - Foreclaimed Self combo will not be reset by casting skills other than Basic Attack - Iai within a short period.
Hold Normal Attack while airborne to perform a Plunging Attack at the cost of STA.
Dodge Counter - Foreclaimed Self
While in Foreclaimed Self, Dodge Counter - Present Self is replaced by Dodge Counter - Foreclaimed Self.
Press Normal Attack within a certain period after a successful Dodge to attack the target, dealing Glacio DMG, considered Resonance Liberation DMG.
Press Normal Attack within a certain period after casting this skill to perform Basic Attack - Foreclaimed Self Stage 3.
Frostblight
Resonance Skill - Present Self
Deal Glacio DMG.
Casting this skill enhances the next Basic Attack - Present Self Stage 3, which now restores 100 points of Dedication when cast. Switching to another Resonator ends this effect.
Press Normal Attack within a certain period after casting this skill to perform Basic Attack - Present Self Stage 3.
If Dedication is below 300 points, hold Normal Attack within a certain period after casting this skill to perform Basic Attack - Present Self Stage 3.
While in Foreclaimed Self, Resonance Skill - Present Self is replaced by Frostblight: Jade Cleave and Frostblight: Petalfall:
Frostblight: Jade Cleave
While on the ground, press Resonance Skill to pull in nearby targets and deal Glacio DMG, removing the targets' Frostbind.
This skill shares a Cooldown with Frostblight: Petalfall.
Frostblight: Petalfall
While in mid-air, press Resonance Skill to pull in nearby targets and deal Glacio DMG, removing the targets' Frostbind.
This skill shares a Cooldown with Frostblight: Jade Cleave.
Foreclaiming
Foreclaiming: Inward Vision
Heavy Attack - Foreclaiming: Inward Vision becomes available after casting Frost Splinter: Present Self.
While in Present Self, press Resonance Liberation to cast this skill, dealing Glacio DMG. Upon casting this skill, gain 3 points of Frostharden Iai, remove 300 points of Dedication and Frostheart. Then, enter Foreclaimed Self and restore 50 points of Frostheart.
Foreclaiming: Inward Vision applies 4 stacks of Glacio Chafe on hit. Casting Foreclaiming: Inward Vision does not consume Resonance Energy, and restores 50 points of Frostheart.
Foreclaiming: Blade Liberation
While in Foreclaimed Self, Foreclaiming: Blade Liberation can be cast via the following ways:
Press Resonance Liberation and release to cast Foreclaiming: Blade Liberation. If Hiyuki has 3 points of Snowforged Blade, consume all Snowforged Blade. Otherwise, this cast does not consume Snowforged Blade.
Hold Resonance Liberation to enter a charging state. During this state, consume 1 point of Snowforged Blade periodically. Release Resonance Liberation to cast Foreclaiming: Blade Liberation. If no Snowforged Blade is consumed when Resonance Liberation is released, Hiyuki will continue to charge the attack and cast the skill automatically after certain time. Foreclaiming: Blade Liberation will also be cast automatically when Snowforged Blade depletes.
Hiyuki deals Glacio DMG. Each point of Snowforged Blade consumed increases the DMG Multiplier of this attack.
Casting the skill consumes 300 points of Dedication and Frostheart, and ends Foreclaimed Self.
Everfrost Dominion
Glacio Bite
While Hiyuki is in the team, Glacio Chafe inflicted by nearby Resonators in the team is converted to Glacio Bite. Every time a new stack of Glacio Bite is inflicted on a target, an instance of Glacio Bite DMG is triggered based on that enemy's current Glacio Bite stack limit. Glacio Bite can be inflicted on frozen targets. Glacio Bite is also considered Glacio Chafe and Glacio Bite DMG is also considered Glacio Chafe DMG.
When Foreclaiming: Inward Vision or Basic Attack - Iai hits a target, if the target has no fewer than 10 stacks of Glacio Chafe, consume 10 stacks and trigger Frostbind once.
When Hiyuki joins the team, remove all stacks Glacio Chafe from the targets. When Hiyuki leaves the team, if there is no other Resonator in the team who can convert Glacio Chafe into Glacio Chafe, all enemies' Glacio Bite stacks are cleared.
Present Self
Hiyuki starts in Present Self. While in Present Self, casting certain skills restores Dedication.
Foreclaimed Self
Hiyuki enters Foreclaimed Self after casting Foreclaiming: Inward Vision. While in Foreclaimed Self, Hiyuki unlocks a new form and restores Frostheart by casting certain skills.
Iai Stance
If Hiyuki has at least 100 points of Frostheart, performing any of the following actions causes her to flash backward at the cost of STA and enter Iai Stance:
Press Dodge after casting any Normal Attacks - Foreclaimed Self other than Heavy Attack - Bitterfrost: Foreclaimed Self, Frostblight: Jade Cleave, Frostblight: Petalfall, Basic Attack - Iai, or Intro Skill - Frostedge.
Hold Resonance Skill within a certain period after casting Frostblight: Jade Cleave or Frostblight: Petalfall.
While performing the actions above, if there is a valid target within the range and the forward input is held down, Hiyuki instead flashes behind the enemy at the cost of STA and enters Iai Stance.
Hiyuki may enter Iai Stance while airborne. Upon entering the Iai Stance, Hiyuki's mid-air Dodge charges are reset. Iai Stance ends if Hiyuki is switched out.
Basic Attack - Iai
Within a certain period upon after entering Iai Stance, press Normal Attack and consume 100 points of Frostheart to cast Basic Attack - Iai, dealing Glacio DMG, considered Resonance Liberation DMG.
If Frostheart remains at 100 points or above after casting this skill, press Normal Attack within a certian period to cast Basic Attack - Iai again.
If Hiyuki is attacked by an enemy within a certain period during Basic Attack - Iai, neutralize this instance of damage and become immune to interruptions for a certain duration afterwards while reducing all incoming DMG by 100%.
Each time Basic Attack - Iai is cast, if Hiyuki has Frostharden Iai, consume 1 stack of Frostharden Iai to inflict 3 stacks of Glacio Chafe on hit, and gain 1 stack of Whiteout Bitterfrost.
Dedication
Hiyuki holds up to 300 points of Dedication.
While in Present Self, casting Basic Attack - Present Self Stage 3 restores 100 points of Dedication and casting Resonance Skill - Present Self enhances the next Basic Attack - Present Self Stage 3, which now additionally restores 100 points of Dedication. This effect ends when Hiyuki is switched out.
Frostheart
Hiyuki holds up to 300 points of Frostheart.
Frostheart is restored while casting Frostblight: Jade Cleave and Frostblight: Petalfall, or when Normal Attacks - Foreclaimed Self other than Heavy Attack - Bitterfrost: Foreclaimed Self hits the target.
Frostharden Iai
Frostharden Iai has a maximum of 3 points.
Casting Foreclaiming: Inward Vision grants 3 points of Frostharden Iai.
Whiteout Bitterfrost
Whiteout Bitterfrost stacks up to 3 times.
Each time Frostharden Iai is consumed through Basic Attack - Iai, gain 1 stack of Whiteout Bitterfrost.
Snowforged Blade
Snowforged Blade stacks up to 3 times.
Each time Heavy Attack - Frost Splinter: Foreclaimed Self is cast, gain 1 stack of Snowforged Blade.
Tune Break: Sword
When the target's Off-Tune Level is full, Hiyuki can cast Tune Break on the target.
While in Present Self, press or hold Normal Attack shortly after casting Tune Break to cast Basic Attack - Present Self Stage 3.
While in Foreclaimed Self, press Normal Attack shortly after casting Tune Break to cast Basic Attack - Foreclaimed Self Stage 3.
Fine Snow
When a Resonator in the team applies Glacio Chafe or Havoc Bane, Hiyuki gains 1 stack of Snow Rust. Snow Rust stacks up to 3 times. Each Resonator can trigger this effect only once in this way.
Based on Hiyuki's current stacks of Snow Rust, the following bonuses are unlocked:
1 stack of Snow Rust: When Hiyuki is the active Resonator in the team, Glacio Bite DMG is Amplified by 30% against targets within a certain range. Hiyuki's Crit. DMG is increased by 40%.
2 stacks of Snow Rust: When Hiyuki is the active Resonator in the team, each time she applies Glacio Chafe, she additionally deals 102% Glacio Bite DMG once.
3 stacks of Snow Rust: When Hiyuki is the active Resonator in the team, Glacio Bite DMG is additionally Amplified by 30% against targets within a certain range.
This effect resets when new Resonators are added to the team.
Ephemeral Realm
Once Hiyuki leaves the combat state or recovers after being knocked out, when she stays out of combat for 4s with has fewer than 1 point of Snowforged Blade, restore 1 point.
Frostedge
Deal Glacio DMG, considered Resonance Liberation DMG, and apply 1 stack of Glacio Chafe on hit.
In Present Self, casting this skill restores 200 points of Dedication. Press or hold Normal Attack within a certain period after casting this skill to cast Basic Attack - Foreclaimed Self Stage 3.
In Foreclaimed Self, press Normal Attack within a certain period after casting this skill to cast Basic Attack - Foreclaimed Self Stage 2.
Snowlight Blessing
Glacio DMG dealt by nearby Resonators other than Hiyuki in the team is Amplified by 20% against targets affected by Glacio Chafe for 20s.
Sequence Node 1
The DMG Multipliers of Basic Attack - Foreclaimed Self, Heavy Attack - Foreclaimed Self, Mid-air Attack - Foreclaimed Self, Mid-air Plunging Attack - Foreclaimed Self, Dodge Counter - Foreclaimed Self are increased by 120%.
Basic Attack - Foreclaimed Self Stage 3 now has an increased range and pulls enemies within range toward the center. Hiyuki is immune to interruptions while casting Basic Attack - Foreclaimed Self Stage 4 & 5.
Casting Foreclaiming: Inward Vision enhances the next Basic Attack - Foreclaimed Self Stage 1 & 2, which now inflict 1 stack of Glacio Chafe on hit.
Sequence Node 2
Basic Attack - Iai's DMG Multiplier is increased by 125%.
Inherent Skill Ephemeral Realm's effect becomes the following one:
Once Hiyuki leaves the combat state or recovers from being knocked out, after staying out of combat for 4s, restore 3 points of Snowforged Blade.
Once Hiyuki leaves the combat state or recovers from being knocked out, after staying out of combat for 4s, the following effects are triggered once:
Restore 3 points of Frostharden Iai.
Reset the Cooldown of 2 charges of Frostblight: Jade Cleave.
Restore an additional 50 points of Frostheart for the next 2 casts of Frostblight: Jade Cleave or Frostblight: Petalfall.
Sequence Node 3
Inherent Skill Fine Snow gains the following effect: Every 2s after a Resonator joins the team or Hiyuki is revived, Hiyuki gains 1 stack of Snow Rust. Hiyuki can obtain up to 1 stack of Snow Rust in this way.
The DMG Multipliers of Heavy Attack - Frost Splinter: Present Self and Heavy Attack - Bitterfrost: Foreclaimed Self are increased by 160%.
At 2 stacks of Snow Rust, while Hiyuki is the active Resonator in the team, the DMG Multiplier of the additionally applied Glacio Bite DMG each time she inflicts Glacio Chafe is increased by 488%.
Sequence Node 4
Casting Resonance Skill: Present Self, Frostblight: Jade Cleave, or Frostblight: Petalfall increases the damage dealt by all nearby Resonators in the team by 20% for 30s.
Restore 18% of Max HP while casting Frostblight: Jade Cleave or Frostblight: Petalfall.
Sequence Node 5
The DMG Multipliers of Resonance Skill - Present Self, Frostblight: Jade Cleave, and Frostblight: Petalfall are increased by 80%.
Sequence Node 6
The Crit. DMG of Foreclaiming: Inward Vision and Foreclaiming: Blade Liberation are increased by 500%.
At 2 stacks of Snow Rust, the effect "While Hiyuki is the active Resonator in the team, each time she applies Glacio Chafe, she additionally deals an instance of Glacio Bite DMG with a fixed DMG Multiplier" changes to "While Hiyuki is the active Resonator in the team, each time a Resonator in the team applies Glacio Chafe, she additionally deals an instance of Glacio Bite DMG with a fixed DMG Multiplier."
At 2 stacks of Snow Rust, Hiyuki's Crit. DMG is increased by 40%.
At 3 stacks of Snow Rust, the total Glacio Bite DMG taken by targets within a certain range of the active Resonator in the team is increased by 25%.
Hiyuki upgrade material information aren't available yet. They will be added soon!
Review
Please keep in mind Wuthering Waves is a skill-based game and each character has a different playstyle, difficulty level and even special tricks and combos. Wuthering Waves is also a team based game and it's only by combining both these factors to the highest level a character can reach optimal performance.
The best Glacio DPS by a huge margin in her best team (literally no competition since Carlotta);
Big AoE hits spread across her rotation alongside grouping gives her pretty good multi-wave capabilities despite being a Negative Status character;
All of her long animations pause in-game timers or at least grant invulnerability, meaning she doesn’t have windows where she’s especially vulnerable (dodging is almost always an option in the worst-case scenario).
Very few alternatives in teammates - Lynae and Chisa are both huge power-ups that lock Hiyuki’s full potential (although Chisa is replaceable by Mornye if Lynae is present, that’s the only replacement comparable to her best team by a lot). Overall not the most F2P-friendly damage dealer ever released.
Weapon alternatives are lacking as well, but F2P options work fine on her - Signature is a notable yet skippable upgrade comparatively to premium teammates.
Hiyuki is a 5-star Glacio Sword DPS character whose mechanics revolve around Glacio Chafe and Liberation DMG. Featuring several big hits across her rotation, built-in grouping capabilities, and a huge damage potential, Hiyuki’s rotation revolves around building her Forte resources efficiently in order to unleash all of her powerful moves in quick succession to dispatch enemies quickly with overwhelming force. Let’s look into how to achieve this exact goal.
Hiyuki has several Forte resources she wants to build up in order to enter her Ultimate stance to deal the majority of her damage to then end it and finish it off with a big AoE-damaging second Ultimate attack (similarly to Zani, just packing more of a punch).
First, she wants to build up Dedication. This can be done via her Intro and her Basic 3 (either accessed directly after her Intro or after her base Skill). This is pretty quick to do, and lets her cast a Heavy Attack that then allows her to enter her Ultimate stance. Once she enters her Ultimate stance, she can then build up Frostheart via Skills and Basic Attacks (2 skills and a full Basic chain will do the trick). This allows her to cast a special Basic Attack called Iai after a dodge, which then converts her Forte into 3 points of Whiteout Bitterfrost. This allows her to cast a special Heavy Attack, to then finally empower her Ultimate with yet another Heavy Attack to finally cast her second Ultimate automatically. At this point, her rotation is finished and she is ready to Outro. That’s her rotation covered and done.
Hiyuki is a Glacio Chafe damage dealer, meaning that she applies Glacio Chafe stacks with several attacks throughout her rotation, stacking up to 10 times by default, being the following:
1 stack via her Intro;
1 stack via her Basic 3;
1 stack via her enhanced Heavy Attack;
4 stacks via her first Ultimate;
1 stack each with her Basic 3, 4, and 5 in Ultimate stance;
3 stacks for each Iai cast;
1 stack for her enhanced Heavy Attack in her Ultimate stance.
That’s 20 stacks applied per rotation, which covers more than the max possible stack count on her own. However, Hiyuki has a particular interaction with Glacio Chafe.
Indeed, she will convert all Glacio Chafe applied on enemies instantly into Glacio Bite, similarly to Zani with Spectro Frazzle and Heliacal Embers (except it’s actually considered Glacio Chafe so it’s a proper Negative Status, unlike Zani’s case). Glacio Bite works very similarly to Glacio Chafe except it can deal significantly more damage via one of Hiyuki’s passives and it also stuns enemies for 2 seconds instead of freezing them like Glacio Chafe would.
Finally, let’s cover the passive (Inherent Skill) in question, called “Fine Snow”. This shapes Hiyuki’s teambuilding. This passive can stack up to 3 times, 1 per applicant of Havoc Bane or Glacio Chafe in the team. Each stack enhances her Glacio Bite damage. Hiyuki will get 1 stack by herself, however she will need teammates to get 2 and 3 stacks; via Chisa, it’s currently possible to get 2 stacks, then when we get another applicant for Glacio Chafe, it’ll be able to stack up to 3. Getting 2 stacks is particularly significant as it makes Hiyuki’s Glacio Bite DMG skyrocket, representing a significant damage boost. This is intended to make Chisa stronger for her teams, and sure enough it makes her a major upgrade in Hiyuki teams. The third stack isn’t a significant damage increase however, so it can be disregarded in the future with minimal consequences.
Hiyuki’s a super strong Glacio main damage dealer, to no one’s surprise. However, she’s quite restricted in teammate options. Due to the way her kit and passives work, as well as available weapon choices to a lesser degree, Hiyuki seriously lacks a variety of options. A character like Aemeath on the other hand, can reach a similar ceiling in all areas currently, yet has a much wider variety of teammate options and similar weapon options. They also both depend on at least having one strong teammate, both being strong Liberation Sword damage dealers, which is a class of characters that lacks F2P-accessible buffers, Jianxin being quite a subpar choice in this aspect and the only available one.
Overall, Hiyuki’s very strong performance-wise but is stranded for good teammates currently, needing to lean into very specific team compositions to reach peak performance. Nonetheless, provided she’s surrounded by the right teammates, she’s going to tear through any content the game has to offer effortlessly, making her an amazing pickup for players looking to lean into her premium team.
Build
The percentages show the performance of the weapon based on calculations, but in some cases, some weapons might provide additional QOL that can't be quantified and it would push that weapon ahead of others in the priority (and in those cases, we would put that weapon higher).
Hiyuki calculations were done using added buffs from the following teammates:
Pact of Neonlight Leap
Rejuvenating Glow
100.00%
Stats at Level 90: ATK: 588 | CRIT Rate: 24.3%
83.10%
Stats at Level 90: ATK: 587 | CRIT Rate: 24.3%
81.30%
Stats at Level 90: ATK: 587 | CRIT DMG: 48.6%
79.20%
Stats at Level 90: ATK: 587 | CRIT Rate: 24.3%
79.00%
Stats at Level 90: ATK: 587 | CRIT Rate: 24.3%
79.00%
Stats at Level 90: ATK: 588 | CRIT Rate: 24.3%
75.90%
Stats at Level 90: ATK: 412 | CRIT Rate: 20.3%
68.70%
Stats at Level 90: ATK: 462 | ATK: 18.2%
100.00%
2 Set: Glacio DMG increases by 10%.
5 Set: Inflicting Glacio Chafe on enemies increases Glacio DMG dealt by 10% for 15s. The Resonator gains the Snowfall effect for 15s, which can be triggered once every 25s. While Snowfall is active: Dealing Resonance Liberation DMG removes Snowfall and increases the Resonator's Crit. Rate by 25% for 6s. While the effect is active, dealing Resonance Liberation DMG extends its duration by 4s, triggered once every 0.5s, up to 6 times. Casting Outro Skill removes Snowfall and grants 25% Glacio DMG Bonus to the incoming Resonator for 15s. When Snowfall is removed, only one of the effects above can be triggered.
This Glacio Chafe DPS and Support focused set provides Hiyuki with a huge 25% CRIT Rate boost on top of 20% total Glacio DMG Bonus, with room for a future Glacio Chafe support to provide her with Glacio DMG Bonus using the same set in the future. This set is the best choice bar none due to its very high stat gains for Hiyuki specifically.
Below you can find Main Echo options that you should be using with the set:
Substats: Energy Regen (Until Satisfied) > CRIT DMG > CRIT Rate (until 75%) > ATK% > Liberation DMG% > ATK
All recommended endgame stats portray a fairly good quality endgame build as a goal to aim for on most characters. However, don’t treat this as an end-all-be-all, and more of a suggestion.
All stat recommendations are given at S0 for 5-stars, S6 for 4-stars, and free characters (unless specified otherwise), based on total stats in the in-game stat-screen with the character out of combat but also active in the party (and hence some buffs may or may not apply). Any other precision may be directly specified. If not specified, Energy Regen requirements are estimated in the character’s best team.
HP: 15000+
DEF: 1150+
ATK: 1800-2200+
Crit Rate: 65%+ (Before Set)
Crit DMG: 210%-260%+
Energy Regen: 120%
Glacio DMG%: 40%-70%+
Below you can find the order of leveling the abilities for Hiyuki.
Res. Liberation
Basic Attack
Forte Circuit
Res. Skill
Intro Skill
Intro can be skipped when levelling to save on resources at a minimal damage loss, with Skill also being semi-skippable but worth investing if resources are available.
Gameplay and teams
Note: Some attack names in Hiyuki’s rotations have been shortened to make them easier to read.
In order to minimize Hiyuki’s field time while ensuring all of the relevant attacks are dealt with maximal damage, we came up with the following rotation:
Intro
Basic 3
Heavy: Frost Splinter
Ultimate: Inward Vision
Skill: Jade Cleave
Skill: Petalfall
Basic: Foreclaimed Self 1
Basic: Foreclaimed Self 2
Basic: Foreclaimed Self 3
Basic: Foreclaimed Self 4
Basic: Foreclaimed Self 5
Dodge (Enter Iai Stance)
Basic: Iai (3 times)
Heavy: Bitterfrost
Hold Ultimate: Blade Liberation
Skill (Swap)
Outro
The Skill before Outro is optional and can be skipped if you take too much time to cast it before swapping out and have enough Energy Regen. It can also be kept for later use, to cast Basic 3 before Intro and then go directly into Heavy: Frost Splinter once Intro is cast.
Best Team
Alternative Teams
Other Support options listed above are possible to use in this team but will provide very subpar results. Not recommended, try to get Chisa for a strong backing in terms of Support.
Calculations
Don't use the damage output calculations as an indication on who is worth pulling or investing as those are just simulations and in day-to-day gameplay there's a lot variables and also the skill of the player is important - if you can't consistently perform the character's rotation, their damage will suffer.
As usual, don't compare the numbers between characters - especially between Main DPS and Hybrids as they fulfill different roles in the team.
The numbers below show the character's DPS (Damage Per Second) and DMG (total damage done). When selecting the rotations we prioritized achieving 100 Concerto as fast as possible and once that condition was fulfilled, we focused on maximizing the damage output. As or if new and more optimal rotations are found, we'll update the characters calculations as needed. Listed character calculations are done without buffs or any damage contribution from teammates (full solo). They only include what the character, their Weapon, Echo and gear are capable of during their ideal Burst or Concerto rotation when starting with their Intro and Resonance Liberation available.
Do note that DPS and DMG aren’t perfect metrics for a character’s individual value and should be taken with a grain of salt. Anything pertaining a character’s relevance in the meta is addressed in our Review and Tier List, which the numbers below shouldn’t be used for as an end-all-be-all to. Instead, DPS and DMG are good metrics for a character’s sequence value and comparison between an individual character’s different rotations. We recommend using those metrics for such purposes.
The calculations were done using added buffs from the following teammates:
Pact of Neonlight Leap
Rejuvenating Glow
Rotation time: 11.55s
Hiyuki (S6)
Hiyuki (S5)
Hiyuki (S4)
Hiyuki (S3)
Hiyuki (S2)
Hiyuki (S1)
Hiyuki (S0)
And here are the Echoes and Weapons used in the calculations.
Stats at Level 90: ATK: 588 | CRIT Rate: 24.3%
2 Set: Glacio DMG increases by 10%.
5 Set: Inflicting Glacio Chafe on enemies increases Glacio DMG dealt by 10% for 15s. The Resonator gains the Snowfall effect for 15s, which can be triggered once every 25s. While Snowfall is active: Dealing Resonance Liberation DMG removes Snowfall and increases the Resonator's Crit. Rate by 25% for 6s. While the effect is active, dealing Resonance Liberation DMG extends its duration by 4s, triggered once every 0.5s, up to 6 times. Casting Outro Skill removes Snowfall and grants 25% Glacio DMG Bonus to the incoming Resonator for 15s. When Snowfall is removed, only one of the effects above can be triggered.
Substats: ATK (45%), CRIT Rate (42%), CRIT DMG (84%)