- Arknights: Endfield
- /
- Characters
- /
- Endministrator
Endministrator Guide and Best Build

Endministrator Introduction
Endministrator is a 6-star character in Arknights: Endfield (AKE). Endministrator wields a Sword and belongs to the Guard class. Endministrator also has access to the Physical element. This guide provides a comprehensive overview of Endministrator's best build, including recommended Weapons, Gear pieces, Stats, and the strongest team compositions and rotations that maximize their potential.
To learn more about Endministrator check the sections below. Use the tabs to quickly switch to the kind of information you're looking for - whether it's best build, teams, synergies or calculations.
Endministrator Video guide
Endministrator has no video guide yet.
Last review update
Patch 1.0
Last major build/calcs update
Patch 1.0
Last profile update*
January 21st, 2026
*Profile update means smaller edits to the guide that don't require new calculations.
To learn more about Endministrator check the sections below. Use the tabs to quickly switch to the kind of information you're looking for - whether it's best build, teams, synergies or calculations.
Profile
Review
Build
Teams & Synergies
Profile
Endministrator Attributes (level 90)
The yellow color shows the Primary Attribute and the green Secondary Attribute. Both of those attributes, on top of their normal bonuses, provide additional ATK to the character.


Endministrator Skills
Destructive Sequence
BASIC ATTACK:
An attack with up to 5 sequences that deals Physical DMG. As the controlled operator, Final Strike also deals 18 Stagger.
DIVE ATTACK:
Basic attack performed in mid-air becomes a dive attack that deals Physical DMG to nearby enemies.
FINISHER:
Basic attack performed near a Staggered enemy becomes a finisher attack that deals massive Physical DMG and recovers some SP.
[Final Strike]: Final Strike is the last sequence of Basic Attack. When the controlled operator's Final Strike hits the enemy, it also deals Stagger and restores some Skill Points (SP).
Constructive Sequence
SP Cost: 100
[Crush]: Applies Vulnerability on an enemy. If the enemy is already Vulnerability, then consume all Vulnerability stacks and deal massive Physical DMG.
Sealing Sequence
Cooldown: 15s
Trigger: When another operator in the team deals DMG with combo skills.
[Physical Status]: Physical Statuses refer to physical debuffs applied to the enemy. They include Lift, Knock Down, Crush and Breach.
[Vulnerability]: Hitting an enemy for the first time with a skill with Physical Status applies Vulnerability instead of the actual Physical Status. A Vulnerability enemy can be Lifted and Knocked Down to add more Vulnerability stacks (up to 4). Hitting a Vulnerability enemy with Crush or Breach will consume the Vulnerability stacks.
[Originium Crystals]: The Endministrator's combo skill attaches Originium Crystals to enemies and immobilizes them.
[Debuff Consumption]: Various Physical and Arts debuffs can be ended early. For example, Crush consumes Vulnerability debuffs, while Combustion consumes Arts Infliction debuffs.
Bombardment Sequence
Energy cost: 80
[Originium Crystals]: The Endministrator's combo skill attaches Originium Crystals to enemies and immobilizes them.
[Debuff Consumption]: Various Physical and Arts debuffs can be ended early. For example, Crush consumes Vulnerability debuffs, while Combustion consumes Arts Infliction debuffs.
Endministrator Talents
Essence Disintegration
[Originium Crystals]: The Endministrator's combo skill attaches Originium Crystals to enemies and immobilizes them.
[Debuff Consumption]: Various Physical and Arts debuffs can be ended early. For example, Crush consumes Vulnerability debuffs, while Combustion consumes Arts Infliction debuffs.
Realspace Stasis
[Originium Crystals]: The Endministrator's combo skill attaches Originium Crystals to enemies and immobilizes them.
Endministrator Potential (dupes)
Final Awakening
Potential 1
[Originium Crystals]: The Endministrator's combo skill attaches Originium Crystals to enemies and immobilizes them.
[Debuff Consumption]: Various Physical and Arts debuffs can be ended early. For example, Crush consumes Vulnerability debuffs, while Combustion consumes Arts Infliction debuffs.
[SP Return]: After spending SP and meeting certain criteria, some of the SP spent will be returned. SP Return is not SP Recovery and do not activate SP Recovery-triggered effects. Spending returned SP also does not gain Ultimate Energy.
Reflection of Authority
Potential 2
???
Potential 3
???
Potential 4
???
Potential 5
Endministrator Lore
In the recorded history of Talos-II, the Endministrator stands as a key guardian who protected civilization on this planet and saved humanity from multiple catastrophic disasters. The Endmin's heroic deeds have given rise to many stories, tales, and even rumors.
However, the Endmin's identity remains elusive, and only a handful of people have seen the legend in person. Other factions within the Civilization Band are well aware that Endfield has a very special trump card in their hand, but that is all they know.
The Endministrator's mysterious mastery over Originium and the Protocol Network, along with the Endmin's need for periodic long-term hibernation, is one of Endfield's most important secrets.
Endministrator Voice Actors
Endministrator Gallery

Review
Endministrator Ratings
Damage
Umbral Monument
Endministrator Pros & Cons
Pros
Grants themself and the team ATK%.
Applies a sizable Physical damage taken debuff, benefitting themself and the team.
Can be played as either a primary damage dealer or support damage dealer.
Incredibly easy to trigger Combo Skill.
Improved SP efficiency when played as main damage dealer.
Cons
Top performance requires careful play around Combo Skill Originium Crystals.
Can only apply Vulnerable to enemies who don’t already have it due to [Crush] being the only source of application.
Endministrator Review
Kit Intro
Endministrator is a 6-star, Physical, sword damage dealer hybrid who is also effective when played as a support damage dealer. Which role Endmin takes in a team depends on whether you want them to be the consumer of the team's Vulnerability stacks. If you have no one else to consume them, then running damage-focused Endmin will be effective. If you already have plans for them to be consumed by another character, though, Endmin can still be useful thanks to the great damage from the rest of their kit and ability to grant the team buffs as well. Also, helpful is the fact that Endmin can slot into any team thanks to its Combo Skill being generically activatable by any character.
Endmin’s damage-focused playstyle revolves around [Crush], which can be activated via their Battle Skill to quickly convert Vulnerability stacks applied to enemies into huge bursts of reaction damage. This, combined with the damage from Endmin’s Combo Skill and Ultimate, makes them a capable Physical carry all at the same time, as they do not need to sacrifice any of their supportive effects.
The appeal of Endmin’s support damage role primarily comes online after unlocking their second Potential, which allows them to grant the team +15% ATK boost. When combined with their talent, which causes enemies afflicted with their Combo Skill to take 20% extra Physical damage during its duration, it allows them to boost the team while still contributing with Stagger and a sizable amount of damage through their Combo Skill and Ultimate.
Combo
Endmin’s Combo Skill is at the heart of their kit, regardless of if you’re playing them as a main or support damage dealer. Its trigger only requires another operator deal damage with their own Combo Skill. On use, it deals Physical DMG and encases the target in Originium Crystals, sealing them for up to 5 seconds. While sealed, if enemies suffer a Physical status or get a Vulnerability stack, the crystals explode, dealing a larger amount of Physical damage, releasing the enemy in the process. The immobilization effect and damage of this combo are good, but how the crystals interact with the rest of Endmin’s kit is truly why it’s powerful.
Note: Elite/boss enemies cannot be frozen by this combo, but will still receive a debuff that still interacts with the rest of Endmin’s kit in the same way.
Talents
Potentials:
Potential 2: Grants half the ATK% (15%) buff of Essence Disintegration to the whole team for 15 seconds, boosting Endmin’s supportive value considerably.
Both of Endmin’s talents are powerful, and each works off their Combo Skills crystals. The first, Essence Disintegration, grants Endmin a 30% ATK boost for 15 seconds after Originium Crystals are successfully consumed, which is a very nice damage increase.
Note: You won't get this bonus if you let the Originium Crystals expire.
Endmin’s other talent causes enemies afflicted with Originium Crystals (sealed or not) to suffer 20% Physical Damage taken. This is a strong damage increase, much rarer than usual. It also remains in effect for damage that removes the Originium Crystals, meaning the Physical status that explodes them, the hit that triggers the status, and the crystal explosion itself will all be boosted.
Tip: For players optimizing, it’s worth using as many high damage attacks and abilities that don’t inflict Vulnerable or Physical statuses before detonating the crystals. This allows you to take advantage of the damage taken debuff, as long as you don’t accidentally let the Originium Crystals expire.
Battle Skill
Potentials:
Potential 1: After activation, consuming Originium Crystals with Endmin’s Battle Skill also returns 50 SP, making it far more efficient when you’re able to trigger the effect.
Endmin’s Battle Skill is simple; it costs 100 SP, deals Physical damage in a cone-based AoE, and inflicts [Crush] to all enemies hit.
In damage-focused Endmin teams, this ability is usually the finisher you’ll be using at the end of your combos to consume the team's Vulnerability stacks. Detonate the Originium Crystals and refund SP in the process.
When playing Endmin in the support damage role, you’ll be saving your Vulnerability stacks for a different character in most cases. Instead, you can use this Battle Skill as an opener against non-Vulnerable enemies to make use of Crush as a Vulnerable applier instead of a spender. This is useful to activate some weapons and sets.
Ultimate
Endmin’s Ultimate costs 80 energy to use and delivers an AoE Physical damage nuke centered on your target. This ability also has an additional effect that enables it to forcibly consume Originium Crystals on the target to deal another hit of Physical damage, which when added, almost doubles the damage of the Ultimate. With such a huge benefit available and the damage taken buff of the crystals themselves, you should always try to align using Endmin’s combo before their Ultimate, so it may consume the Originium Crystals.
Gameplay
Endmin has two playstyles:
DPS
In teams where Endmin is one or the main character consuming Vulnerability stacks on enemies, follow this approach:
Build Vulnerability stacks through team abilities;
Time Combo Skill, so it can be detonated by Endmin’s Battle Skill or Ultimate. To gain more damage, use other abilities in between your combo and Battle Skill/Ultimate, which don’t apply Physical statuses, or Vulnerable, to take advantage of the crystals’ damage taken debuff.
Detonate Originium Crystals from Combo Skill using Ultimate if available, preferably after enemies are Staggered.
If Ultimate is not up, and you’ve accumulated all the Vulnerability stacks, you’re able to use Battle Skill to consume them as well as your combos crystals.
Support Damage
In teams where another character is consuming Vulnerability stacks, the majority of the time, proceed with this approach instead:
Use Endmin’s Battle Skill to establish the first stack of Vulnerable on enemies so they can activate set and weapon effects without interfering with your other Vulnerable spenders' rotation.
Time Combo Skill, so it can be detonated by Endmin’s Ultimate if available, or your team's Vulnerable spender’s spending ability. To gain more damage, use other abilities in between your combo and Ultimate/Team Spender, which don’t apply Physical statuses or Vulnerable, to take advantage of the crystal's damage taken debuff.
Detonate Originium Crystals from Combo Skill using Ultimate if available, preferably after enemies are Staggered.
Detonate Crystals with the team's Vulnerable spending skill if the Ultimate is not available.
Build
Endministrator Best Weapons
The percentages show the performance of the weapon based on calculations, but in some cases, some Weapons might provide additional QOL that can't be quantified and it would push that weapon ahead of others in the priority (and in those cases, we would put that weapon higher).
The solo percentage shows how the weapon impacts Endministrator performance if you look at their damage in the vacuum, while the team percentage shows the impact of the weapon when taking into account full team, including buffs etc.
Stat 1 Boost - 9/9
Agility: +156
Stat 2 Boost - 9/9
Attack: +39.00%
Passive Boost - 4/9
Arts Intensity: +48
Stat 1 Boost - 9/9
Main Attribute: +132
Stat 2 Boost - 9/9
Physical DMG Bonus: +43.30%
Passive Boost - 4/9
Attack: +16.00%
A close alternative to Grand Vision for Endmin's personal damage thanks to a great combination of passives, which only slightly loses out to Grand Vision, but most notably has a Weapon Effect that grants a team-wide supportive bonus that also boosts Endmin's own damage by a significant amount. This is why it can compete and sometimes even be more valuable than Grand Vision in team scenarios.<br/>Note: Eminent Repute's weapon effect only functions when Endmin is consuming Vulnerability stacks, so if they aren't the one activating Crush in the team, this Sword loses significant value compared to what is displayed.
Stat 1 Boost - 9/9
Agility: +124
Stat 2 Boost - 9/9
Physical DMG Bonus: +34.70%
Passive Boost - 9/9
Attack: +14.00%
A solid 5-star option for Edmin, which has great passive stats for Endmin but at lower values than their 6-star options. This Sword's weapon effect is also solid, although it only works if Endmin is applying Crush, and can usually only reach one stack in most team compositions. Because of these reasons, it falls behind Endmin's top options.
Stat 1 Boost - 9/9
Main Attribute: +132
Stat 2 Boost - 9/9
Critical Rate: +19.50%
Passive Boost - 4/9
An underwhelming Sword given its 6-star rarity. Has a mediocre mix of passives, with one of them being conditional and only working on Ultimate and Skills and the other one being Crit Rate, a stat Endmin doesn't want. Fortunately, the Weapon effect isn't bad, but it's not outstanding either. To make the most of it, you'll need to ensure you focus on landing Endmin's Ultimate during Stagger.
Stat 1 Boost - 9/9
Agility: +93
Stat 2 Boost - 9/9
Physical DMG Bonus: +26.00%
Passive Boost - 9/9
Last resort option if you're lacking any of the choices above. Has the correct passive stats, but all at much lower base values, setting it significantly behind all other choices
Endministrator Best Gear Set
The solo percentage shows how the set and gear impact Endministrator performance if you look at their damage in the vacuum, while the team percentage shows the impact when taking into account full team, including buffs etc.
Stagger Efficiency Bonus +20%. When the wearer applies a Physical Status, the wearer also performs 1 hit that deals 250% ATK of Physical DMG and 10 Stagger. Effect trigger cooldown: 15s.
Description
Swordmancer isn't Endmin's best choice for personal damage (although it's close), but its 3P bonus has a much better supportive effect, which, if you're okay giving up a little damage, is usually their best option. The 3P bonus of Swordmancer grants an on-hit effect that deals 10 Stagger every 15 seconds, and increases all Stagger Endmin outputs by 20%. It's important to keep in mind, though, in order to activate Swordmancer's on-hit effect, Endmin must apply a Physical status which when playing them as a support damage dealer, where they don't usually activate Crush, they won't be doing. In these scenarios, the on-hit effect won't activate, but the set can still be used for its 20% Stagger; it's just less effective than when playing Endmin actively using Crush.
Pieces
Armor
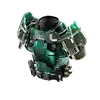
Gloves

Kit
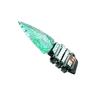
Kit

Attack +15%. When the wearer casts a combo skill, gain 1 stack of Bonekrushing Smash that grants DMG +30% to the next battle skill cast. Bonekrushing Smash can stack 2 time(s).
Description
Best 3P damage choice for Endmin by a small margin, which usually isn't enough to justify giving up the team utility Swordmancer provides, especially given you have to play around stagger windows in order to unlock its potential.
Note: To get the listed results from this set, you'll need to make optimal use of stagger windows to take advantage of both kits having DMG% vs Stagger. If you can't, this set's performance will notably drop.
Pieces
Armor

Gloves

Kit

Kit

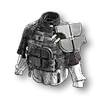
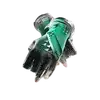
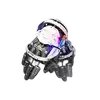
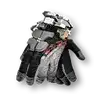
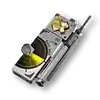
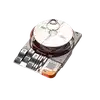
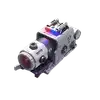
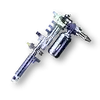
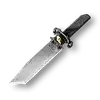
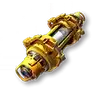
Endministrator Best Gear Pieces
Keep in mind that the gear pieces below are being compared against having nothing equipped on the character at all. This means that in some cases, when you include Weapons, other pieces, outside buffs etc, the values of some pieces may change. For more accurate information, check the section above where we picked the best combination when you look at all pieces equipped.
Pieces marked with a star* can perform better than listed - this applies to:
- Ult gain efficiency pieces, granting new Ultimate breakpoints,
- Arts Intensity boosting the efficacy of Electrification, Corrosion and Breach, rising overall team output even if personal damage is less impressive.









Endministrator Dupes Calculations / Review
Endministrator dupes can be obtained for free. That's why the guide and review above already assumes you have the currently available number of dupes and we're not reviewing each separately.
Endministrator Calculations
In this section we're showing the team setup used for the above calculations as well as the damage split for Endministrator based on where it comes from. The setup isn't always best in slot for each character and also please keep in mind that with different team members, Weapons, and Gear, the calculations will change.
Endministrator Damage Split
Endministrator Skill Priority
Main Field:
Basic Attack > Battle Skill = Ultimate >= Combo Skill
Off Field:
Battle Skill = Ultimate >= Combo Skill >= Basic Attack
Teams and Synergies
Endministrator Best Synergies
- Applies a Vulnerability stack for free with Combo, allowing higher stack sizes to be much more efficiently achieved, leading to consistently higher Crush damage throughout the fight. This effect alone earns her a place in almost every Physical team.
- Higher than average Stagger across her kit
- Very capable Sub-DPS damage potential even with zero resources allocated to her
- Chen benefits nicely from Endmins teamwide buffs, boosting her damage further
- Can either act as a support for Pog or have Pog support them
- When supporting Pog gains a large damage boost from his Breach damage taken debuff
- When being supported by Pog gains a constant flow of extra SP and buffs from his outstanding supportive weapon and set options
- Pog's AoE gathering ultimate can concentrate enemies for Endmin to blast down with their Ultimate or Battle Skill
- Pog himself benefits nicely from Endmins teamwide buffs, boosting his own damage both as the carry and support
- Hyper optimized teams can combine both Breach and Crush, getting the best of both DPS Endmin and Pog.
- Lifeng generates bursts of Vulnerability with the Ultimate to fuel more frequent, higher stack size Crushes
- Lifeng applies Physical Susceptibility to targets, boosting Endmin's damage potential
- Lifeng applies Link to the team which, when not consumed by his own Ult, can be used by Endmin to amplify their Ult or Battle Skill
- Endmin provides team-wide buffs while performing their role as a damage dealer, which will raise Lifeng's damage potential as well
- Able to permanently maintain both Arts and Physical susceptibility on targets for generic team-wide damage increases that work in any team
- Outstanding supportive weapon and set options for even more damage amplification, with options that work for both Physical and Arts
- Forcibly applies Corrosion, which, when optimized around, can lower enemy resistances to all damage temporarily if Susceptibility doesn't need to be refreshed
- Only requires 100 SP roughly every 30 seconds to function at maximum capacity
- Strong enough sustain to single handedly keep the team alive through most endgame encounters as long as smart dodging is used.
- Estella applies an outstanding amount of Vulnerability with her combo skill and very cheap Ultimate
- Estella applies Physical Susceptibility to boost the entire team's Physical damage
- Estella herself benefits nicely from Endmin’s teamwide buffs, boosting her own damage as well
- Estella unlocks a new way to play Physical teams Solidifaction-Physical hybrid
- Spammable combo skill that triggers off of Endmin's Originium Crystals and which refunds SP
- Strong supportive set and weapon options which boost the team's damage
- Extra synergy when played within the Solidification-Physical hybrid build
- Even more buffs for Endmin and the team after unlocking P3
- Endmin can consume Vulnerability stacks via Crush, contributing high personal damage from all Vulnerability stacks from Rossi.
- Physical DMG buff on Originium Crystals is relevant for Rossi and P2 ATK buffs can be set up for burst periods.
- Very SP intensive and although return on Originium Crystal consumption does help, it can be clunky to align at times.
Endministrator Teams
Endministrator teams aren't listed in any specific order - so they're not listed best to worst or vice versa. Check our Team Tier List for more information about best teams.
Team Members
Opening rotation (Endmin Version)
If you want to deal direct damage with Endmin using Crush use the rotation listed directly below, but if you want to use Breach use the Pog one.
Opening rotation (Pog Version)
If you'd prefer to infliction Breach over the upfront damage of Crush make a slight adjustment and use this opener instead
After your opener is done and your team's combos are on cooldown, there will be spare SP available for Ardelia to apply her Battle Skill debuffs without interfering with your rotation. Throughout the rest of the fight, omit Ardelia from the rotation above and instead execute what's listed below during downtime to keep her Susceptibility active without chewing up SP from your rotation.
Ultimate timings
- Endministrator - Use Endmin's Ultimate directly after their Combo Skill to ensure it consumes the Crystals to deal additional damage.
![Endministrator]()
- Chen Qianyu - Use Chen's Ultimate after Endmin's Combo aswell - it doesn't apply Vulnerability or a Physical Status so it will gain the Crytals debuff without Shattering them, meaning Endmin's Battle Skill will still gain full value.
![Chen Qianyu]()
- Pogranichnik - Use Pog's Ultimate to gather enemies in AoE encounters and or before your main rotation to ensure you can consume stacks quickly.
![Pogranichnik]()
- Ardelia - Save Ultimate for before one of your rotations, ideally during Stagger. Ardelia should be using Stanza Memoralis so using her Ultimate this way will buff the team.
![Ardelia]()
Extra things to look out for
- Against weaker enemies and those who struggle with sequencing all four characters at once, investing the time into establishing Ardelia's Combo Skill at the start of your rotation may not be worth it, instead you can skip it and go straight to your Physical rotation.
- Also against weaker enemies that may die in a single Crush/Breach, you can cut Chen's Battle Skill from the rotation to reduce its total cost to 200 SP instead of 300, making it immediately usable at the start of combat.
- Both the Endmin and Pog rotations can be interchanged in combat depending on what you need. If enemies are likely to last longer, you can apply Breach, but if they may die quickly, Crush might be more optimal.
- When playing Pog on Swordmancer and not using triggering Breach with his Battle Skill, the first Endmin Battle Skill can be swapped out for Pog's Battle Skill in order to weave in triggering Pog's Swordmancer passive.
Team Members
Opening rotation
After your opener is done and your team's combos are on cooldown, there will be spare SP available for Ardelia to apply her debuffs without interferring with your rotation. Execute the below to keep her Susceptibility up the rest of the fight. You can also omit her in the rotation above as after the opener, it's better to use her Combo during downtime.
Ultimate timings
- Endministrator - Use Endmin's Ultimate directly after their and Lifeng's Combo Skill to ensure it consumes the Crystals and Link to deal additional damage,
![Endministrator]()
- Chen Qianyu - Use Chen's Ultimate after Endmin and Lifeng's Combos as well. It doesn't apply Vulnerability or a physical status, so it will gain the Crystals debuff without Shattering them, meaning Endmin's Battle Skill will still gain full value.
![Chen Qianyu]()
- Ardelia - Save Ultimate for before one of your rotations, ideally during Stagger. Ardelia should be using Stanza Memoralis so using her Ultimate this way will buff the team.
![Ardelia]()
- Lifeng - When Lifeng's Ultimate is available, in order to make use of the 2 Vulnerable it provides, it's best to modify your rotation. Remember to wait for a short pause so the Ultimate finishes casting and you get both Vulnerability stacks. Here is what we recommend adjusting to as a starting point:
![Lifeng]()
Extra things to look out for
- Against weaker enemies and those who struggle with sequencing all four characters at once, investing the time into establishing Ardelia's combo skill at the start of your rotation may not be worth it. Instead you can skip it and go straight to your physical rotation,
- Also against weaker enemies that may die in a single Crush, you can cut Chen's Battle Skill from the rotation to reduce its total cost to 200 SP instead of 300, making it immediately usable at the start of combat.
- Lifeng's Battle Skill has a long animation. Make sure not to use Ardelia's Combo skill until it lands, otherwise you may accidently trigger Endmin's combo before Chen's, ruining the rotation.
- Once you're confident in the timings, you can begin Lifeng's Battle Skill halfway through your Main Field Character's Basic Attack animation so that it lands right after the Final Strike, which will trigger Ardelia and then Chen Combo in quick succession. Just be careful you don't have Lifeng's Battle Skill land before your Final Strike, otherwise Ardelia's Combo will be blocked.
Sometime's you'll have multiple Ultimates available at the same time and will have to choose which to buff with Lifeng's Link here is the priority order: ![]()
![]()
![]()
Team Members
Opening rotation
After your opener is done and your team's combos are on cooldown, there will be spare SP available for Ardelia to apply her debuffs without interferring with your rotation. Execute the below to keep her Susceptibility up the rest of the fight. You can also omit her in the rotation above as after the opener, it's better to use her Combo during downtime.
Ultimate timings
- Endministrator - Use Endmin's Ultimate directly after their Combo skill to ensure it consumes the Crystals to deal additional damage,
![Endministrator]()
- Estella - Use Estella's Ultimate after her Combo skill but before you use Endmin's combo. This will apply an extra stack of Vulnerability and using it before Endmin's Combo will ensure you don't explode their crystals with it wasting them,
![Estella]()
- Alesh - Use Alesh's ultimate either alongside Estella's Battle Skill or before your rotation starts. Just make sure you don't use it too soon during downtime as doing so will apply its Cryo Stack too early and disable Ardelia's combo from triggering,
![Alesh]()
- Ardelia - Save Ultimate for before one of your rotations, ideally during Stagger. Ardelia should be using Stanza Memoralis so using her Ultimate this way will buff the team.
![Ardelia]()
Extra things to look out for
- Against weaker enemies and those who struggle with sequencing all four characters at once, investing the time into establishing Ardelia's combo skill at the start of your rotation may not be worth it. Instead you can skip it and go straight to your physical rotation.
Team Members
Copyright © 2022 - 2026 Prydwen.gg





Endmin's Signature is their best option for damage, but is comparable to Eminent Repute in a lot of cases when it comes to overall team output, assuming you're running Endmin along other capable Physical damage dealers. Its edge in personal damage comes from its optimal combination of passive stats and strong Weapon Effect that can be triggered multiple times a fight. What makes Eminent a viable alternative, though, is the fact that it buffs the entire team on use.<br/>Note: Weapon calculations are using a Crush Endmin rotation, which gains notable value out of this weapon's Arts Intensity. If you're not crushing with Endmin, its performance will drop.