
Terrormaton Boss Guide

Terrormaton is a high-threat Threshold boss, designed to challenge players with intense AoE damage, speed and defense debuffs, and punishing mechanics that snowball if not handled properly. His early battle [Immunity] makes it difficult to apply debuffs at the start, and his attacks only get stronger over time through passive scaling and Beast Head synergy.
To beat Terrormaton, focus on bringing a balanced team with cleansing, dispelling, and healing. Cleanse key debuffs like [SPD-], [DEF-], and [Wound], and use dispel abilities to remove [Immunity] and [DEF+] as soon as possible. Defensive buffs and shielding are critical, especially after Reconstructive Strike, which can trigger lethal follow-up attacks from the Beast Heads. Always maintain your team’s HP to prevent being targeted and eliminated by low-HP attacks.
Avoid letting allies die at all costs - Combat Resolve will give Terrormaton an immediate extra turn, accelerating the fight against you. Speed control is another essential tool, allowing your team to act before Terrormaton and his heads. Build your comp around survival, debuff management, and consistent DPS, and you’ll find the fight far more manageable even on higher difficulties. With planning and proper execution, Terrormaton becomes less of a terror and more of a milestone to conquer.
Terrormaton Overview
- Boss Name: Terrormaton.
- Element: Hollow.
- Challenge Type: Threshold Final Boss.
- Difficulty Tiers: Normal → Hard → Nightmare → Hell → Inferno.
- Key Threats: Powerful lasers, debuffs (Speed and Defense), Start of Battle Immunity, Beast Head mechanics, and damage acceleration.
- Turn Meter Resist: The boss reduces the effectiveness of Turn Meter decrease used on him. It's 30% reduction pre-inferno and 70% when you reach Inferno. This makes using Marvell/Mio and other turn pushers not as effective anymore.
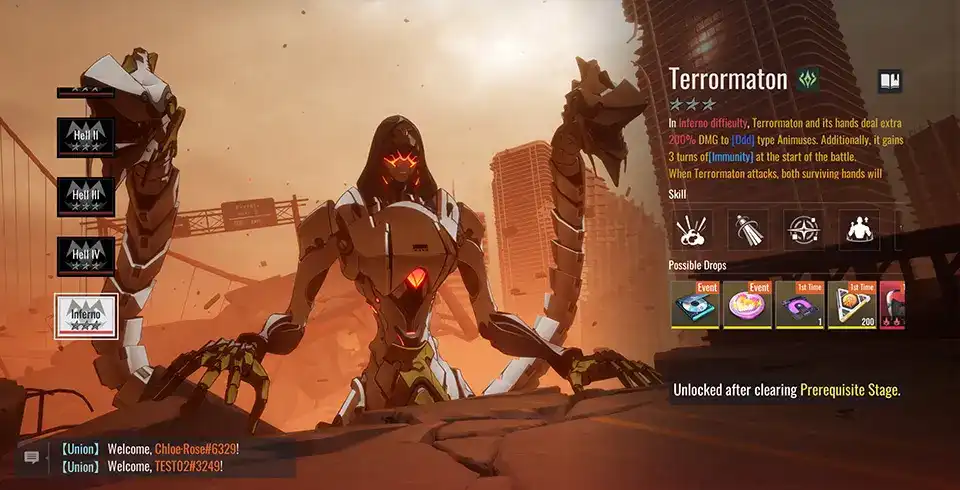
- Odd Units Vulnerable: On Inferno the boss deals 200% bonus damage to Odd affinity units - using them will most likely result in failure. Before the Inferno difficulty the bonus damage is lower.
Skills Overview
Terrormaton’s abilities can catch you off guard if you’re not prepared. Here’s a detailed breakdown of his abilities and how to counter them.
Scorched Earth
Terrormaton fires massive lasers to attack all enemies, dealing 450% damage. There's a 70% chance to set Turn Meter back by 30% and inflict a 1-turn [SPD-] debuff.
- [SPD-]: Decreases SPD by 30%.
How to counter?
- Cleanse Debuffs: Use characters who can cleanse debuffs after the attack to remove the [SPD-] debuff quickly.
Reconstructive Strike
Terrormaton fires lasers to attack all enemies, dealing 600% damage and permanently increasing Basic ATK by 30%. After the attack, each surviving Beast Head will automatically follow up on the enemy with the lowest HP percentage, dealing 360% damage.
How to counter?
- Keep HP High: Be sure to heal your team immediately after this attack to prevent any units from dying. The Beast Heads will target units with low HP, so maintaining healthy characters is key.
- Defensive Buffs: Use defensive buffs to reduce incoming damage and protect your team from the Beast Heads’ follow-up attacks.
Combat Resolve
Whenever an enemy dies, Terrormaton immediately starts his next turn.
How to counter?
- Prevent Deaths: Keep your team alive by managing healing and shields. If possible, avoid having units die, as it will trigger an extra turn for Terrormaton.
- Turn Meter Control: Use turn meter manipulation/slow debuffing units to slow down Terrormaton’s turn cycle, especially if you’re at risk of losing units.
Prepare for Battle
At the start of the battle, all allies gain 3 turns of [Immunity].
- [Immunity]: Cannot receive any Debuffs effects, CD increase or Turn Meter reduction.
How to counter?
- Dispel the Immunity: Dispelling units will be amazing against this effect - being able to get rid of Immunity will give a huge advantage during this fight.
- Timing is Key: Once the Immunity fades, prioritize applying your debuffs to Terrormaton.
Reform – Guarding Hand
The Beast Heads grants Terrormaton a 2-turn [DEF+] buff, cleanses 1 debuff, and grants 45% Turn Meter to Terrormaton.
- [DEF+]: Increases DEF by 60%.
How to counter?
- DEF- Debuffs: Apply [DEF-] debuffs to Terrormaton to counter the [DEF+] buff.
- Dispel the DEF-: Or simply dispelling the [DEF+] buff will give a huge advantage against this effect!
- Prepare for Turn Meter boost: Be ready for the Turn Meter boost. Use this time to unleash your most powerful abilities before he gets the chance to take full advantage of the acceleration.
Reform – Attacking Hand
The Beast Head fires at the enemy with the lowest HP, dealing 360% damage and has a 100% chance to inflict a 2-turn [DEF-] debuff and [Wound]. The lower the target’s HP, the higher the DMG dealt.
- [DEF-]: Decreases DEF by 60%.
- [Wound]: Cannot receive healing.
How to counter?
- Balance Your HP: Avoid having a unit drop too low in health to minimize the damage from this attack. Heal low-health units before this ability triggers.
- Cleanse Debuffs-: If a unit is hit with the [Def-] & [Wound] debuffs, try to dispel them as soon as possible to allow healing! Shields can help to prevent taking massive damage from subsequent attacks.
Terrormaton - Best Characters
In this section we will showcase the characters you can bring to deal with the boss - focusing more on ease of clearing the boss (rather than doing it super fast) and also to use as many SR characters as possible.
- Main DPS (Pick 1/2):
- Diting - the hardest hitting SR DPS character, but his Mark is pretty annoying at times. That's why you often run him in dual-dps team - for example with Victor,
![Diting]()
- Sania [Vengeful Thorn] - DoT-focused DPS who can just ignore DEF+ buffs that Terrormaton constantly throws on himself as DoT deals 4% Max HP damage. Make sure to pair her with
![Sania [Vengeful Thorn]]() Fangus so she has more DoTs to trigger with her S3,
Fangus so she has more DoTs to trigger with her S3,![Fangus]()
- Liliam - exceptional Burst makes her an amazing Boss buste.
![Liliam]()
- Yeli - great sustained single target damage and DEF- allow Yeli to perform really well against most PVE bosses, Terror included.
![Yeli]()
- Khloros - a great DPS who is used as FUA attacker, allowing him to attack more often than other DPS.
![Khloros]()
- Massiah - a Light DPS who can work against any boss due to how universal his kit is.
![Massiah]()
- Dispel source (Pick 1):
- Heinrich - a Dark DPS/Debuffer hybrid who also provides you with Dispel source (to get rid of Immunity and DEF+),
![Heinrich]()
- Mizuki Makoto - with dispel available on both S1 and S3, Makoto is a great addition to the team - especially that she also has DEF+ to help the team surive.
![Mizuki Makoto]()
- Turandot - a dispeller who provides the team with DEF+ and ATK+ buffs. Just keep in mind on auto, she will use her S3 first, but dispel is tied to S2 - so you start the battle manually and then switch to auto after using S2,
![Turandot]()
- Veronika - another dispeller who steals the buffs and shares them with her allies - she also applies a shield to them, helping them survive Terrormaton attacks.
![Veronika]()
- Mia - she has dispel on S2, but on auto she uses S3 first - so you have to use her on manual at the start of the battle,
![Mia]()
- Best Supports (Pick 2/3):
- Lily - a top-tier buffer who provides SPD+ to all allies and additional buffs to one marked ally (the main carry),
![Lily]()
- Beyontin - another buffer who is used in Victor one-shot teams as she can provide a lot buffs to him and also push his turn meter by 100%,
![Beyontin]()
- Chiaki [The Echo] - another turn-meter pusher, but for the whole team who provides allies with ATK+ buff,
![Chiaki [The Echo]]()
- Helkid - a shielder/DPS hybrid who can also debuff enemies with ATK-,
![Helkid]()
- Gray - a DPS/Buffer/Debuffer hybrid that buffs your team's CRIT Rate and reduces enemies DEF while at the same time dealing decent damage,
![Gray]()
- Dinah - a top-tier debuffer that amplifies the damage dealt to enemies. She can not only inflict DEF- and DMG Taken debuffs on them, but also inflict unique debuff that causes them to receive additional True Damage,
![Dinah]()
- Freya - a Buffer/Debuffer hybrid that provides ATK+ and DEF+ buffs to the enemy, increases the damage taken on enemies and boosts allies Turn Meter (while reducing enemy turn meter when they are debuffed),
![Freya]()
- Kloss - another debuffer that has pretty insane combination of debuffs: DEF-, DMG Taken+, DMG Dealt- and Speed down. On top of that, she can steal turn meter from enemies and give it to her allies,
![Kloss]()
- Sania or
![Sania]() Valerian - both are great Sustain characters that can keep the team alive. Sania offers heals and revives, while Valerian is more shield-focused and also can provide additional buffs to the team,
Valerian - both are great Sustain characters that can keep the team alive. Sania offers heals and revives, while Valerian is more shield-focused and also can provide additional buffs to the team,![Valerian]()
- Mia - a healer/shielder who also can dispel enemies (but on a long cooldown, so you can't rely on her for that) and extend buffs on allies/shorten debuffs.
![Mia]()


![Sania [Vengeful Thorn]](/static/3cb02f3e1579dddb53b8c9947ea14d12/60b4d/Sania_withered_sm.webp)


![Chiaki [The Echo]](/static/86fddbe08e3b9d93a6ed6dcd10af8544/60b4d/chiaki_echo_sm.webp)


Terrormaton Best Teams (Overall)
If you don't have some of the characters visible in the teams, you can replace them with another one that fulfills the same role (check the section above).
The teams for the section are targeted for the highest difficulty - Inferno - but obviously they will also work in the lowers one. Those aren't the only teams that work against the boss - only the ones we found to be optimal ones without overloading the team with Light/Dark characters.

Terrormaton Inferno #1
Content: Terrormaton || Team type: Generic || Time: 1-2m

Terrormaton Inferno #3
Content: Terrormaton || Team type: Generic || Time: 1-2m
![Dorothy [The Wisher]](/static/7bccd1a501cba448cb34ae6ea8d879af/60b4d/dorothy-wisher_sm.webp)
Terrormaton Inferno #5
Content: Terrormaton || Team type: Generic || Time: 1-2m
![Cachi [The Guard]](/static/c25b1b09ae6990e90b27ad9f2163474a/60b4d/cachi-guard_sm.webp)

Terrormaton Inferno #8
Content: Terrormaton || Team type: Generic || Time: 1-2m

Comments
Can replace Diting with Yeli.
Terrormaton Inferno #9
Content: Terrormaton || Team type: Generic || Time: 1-2m

Terrormaton Inferno #10
Content: Terrormaton || Team type: Generic || Time: 1-2m
Terrormaton Inferno #12
Content: Terrormaton || Team type: Generic || Time: 1-2m

Terrormaton Inferno #13
Content: Terrormaton || Team type: Generic || Time: 0-1m


Terrormaton Inferno #20
Content: Terrormaton || Team type: Generic || Time: 0-1m


Module Drops
Each of the three Threshold bosses drops different gear sets (called Matrix Effects here), and below you can find a list of Matrix Effects dropped by Terrormaton.


Onslaught
Type: ATK
Source: Terrormaton
4/12: ATK +10%
8/12: ATK +25%. Lifesteal +12%
12/12: ATK +45%. Lifesteal +30%

Keeneye
Type: ATK
Source: Terrormaton
6/12: CRIT DMG +18%
12/12: CRIT DMG +18%. The first three instances of damage dealt by Animus during the turn increase by 25%, 15%, and 5% respectively.

Furyedge [INFERNO ONLY]
Type: ATK
Source: Terrormaton
6/6: CRIT Rate +12% & CRIT DMG +20%

Wellspring
Type: HP / Healing
Source: Terrormaton
4/12: HP +10%
8/12: HP +25%. Reduces DMG Taken by an additional 10%.
12/12: HP +45%. Reduces DMG Taken by an additional 25%.

Cure
Type: HP / Healing
Source: Terrormaton
4/8: HP +10%
8/8: HP +10%. Increases Healing and Shield Provided by 25%.

Battlewill
Type: Special / Control
Source: Terrormaton
4/8: ATK +10%
8/8: ATK +10%. After the Animus uses an attack skill, there is a 30% chance to launch Follow-up Attack on the main target.

Etherplague [INFERNO ONLY]
Type: Special / Control
Source: Terrormaton
6/6: HP +25% & Effect ACC +20%